

Dynamically Resizing UITableViewCells in Xamarin.iOS
I recently needed to implement a UI that required a UITableViewCell to have an expandable “notes” fields within it, with the expansion triggered by a button within the cell itself. Getting this to work was a little tricky. So if you find yourself in this situation, I hope you can get some ideas from me, for better or worse!
For this, I assume you have a basic knowledge of layout constraints and the iOS interface builder (you could probably use Xamarin Studio to do this, but I’ll be using Xcode because I love myself), and UITableView functionality. I am also assuming you can wire up actions and outlets between the designer and your classes.
The objective here is to have an expandable/collapsible UITextView in a UITableViewCell, and to have it controlled by a UIButton touch event within the cell.
To do this, we need to:
- Create a reusable cell with layout-constraint-magic™
- Trigger a cell reload from within the cell
- Reset the reusable cell’s state based on the state of the data source
Step 1 – The cell
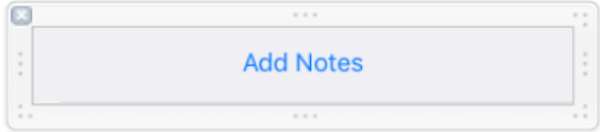
This is a pretty basic UITableViewCell. It has a UIButton in the center and a collapsed UITextView above the button. It’s easier to build the expanded cell and shrink it down, so let’s take a look at that:

That’s better.
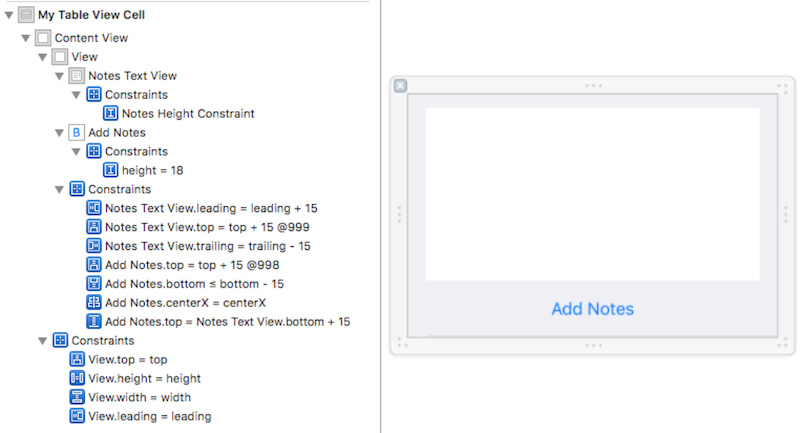
Note: Before you start dragging controls into the content view, put a regular UIView in there and stick it to the top/leading/height/width of the content view. This will satisfy the interface builder by providing enough layout information with the constraints below.
The basic layout we’re going for here is 15pt spacing on all sides, and 15pt vertical spacing between the button and the text view. To accomplish this, we of course need 15pt leading, top, and trailing constraints on the text view and a 15pt bottom on the button. We also need a height constraint on the text view to which we can attach an outlet and dynamically change in code as the app runs.
The tricky part now is the button needs a vertical spacing constraint between itself and the text view (15pt) when the view is expanded, and a vertical spacing constraint between itself and the super view top (15pt) when the view is collapsed. When we add these two constraints in, the interface builder tells us we have problems.
Everything works beautifully if we give the constraint that goes from the top of the text view to the top of the super view a priority lower than 1000, and the constraint that goes from the top of the button to the top of the super view a priority lower than that. This is because the space between the button and text has a higher priority than the other vertical spacing, which pushes up the text view when the view shrinks. This is fine for us because we’ll be shrinking down the text field to nothing at the same time. Now set the text height constraint to 0 and shrink the view back down to normal size.
Here’s what it looks like with all the constraints:
Step 2 – Trigger a cell reload from within the cell
The hard part’s over. After we programmatically grow or shrink the text view’s height constraint, we need to reload that row. When I set up my cell in UITableView.GetCell, I simply pass this action into the cell so the cell can let my table know when to do so.
public UITableViewCell GetCell(UITableView tableView, NSIndexPath indexPath)
 {
 var cell = tableView.DequeueReusableCell(MyTableViewCell.Key, indexPath) as MyTableViewCell;

  cell.SetupCell(dataSource[indexPath.Row], () =>
    tableView.ReloadRows(new NSIndexPath[] { indexPath }, UITableViewRowAnimation.Automatic));

  return cell;
 }
The MyTableViewCell class contains a setup method to take in the data model for the cell and the reload row function. The model simply contains a notes field and a bool “ShouldDisplayNotes” flag. When the “Add Notes” button is tapped, the flag is flipped, the constraint height is toggled between the desired height and zero, and the reload row function is called.
When the cell is reloaded, UITableView.GetHeightForRow will be called, so this needs to be overridden to return the conditional height:
[Export("tableView:heightForRowAtIndexPath:")]
 public nfloat GetHeightForRow(UITableView tableView, NSIndexPath indexPath)
 {
 return dataSource[indexPath.Row].ShouldDisplayNotes
    ? MyTableViewCell.ExpandedHeight
    : MyTableViewCell.NormalHeight;
 }
I have some constants defined in MyTableViewCell to help this method out.
public static readonly int ExpandedHeight = 210;
public static readonly int NormalHeight = 45;
Step 3 – Reset the reusable cell’s state based on the state of the data source
Because our UITableView is using reusable cells, as we scroll through the table, iOS is going to… wait for it… reuse the cells. This means some cells will be in the expanded state and some will be in the collapsed state, regardless of the data source. So each time GetCell is called, the cell needs to be initialized accordingly. This is why I included a “ShouldDisplayNotes” in my example model. For a complete example of MyTableViewCell as well as the rest of the project, please check out https://github.com/DontPanicLabsBlog/DynamicTableRowHeightDemo.
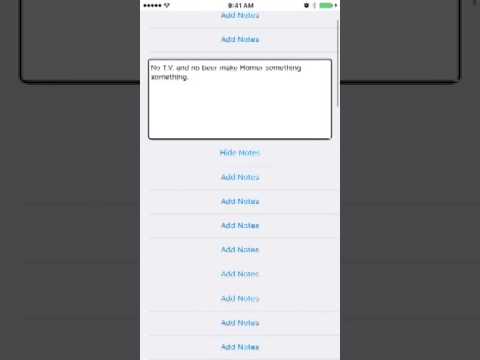
Demo
An Alternate Approach
You might be able to set your UITableView row height to UITableViewAutomaticDimension and have it figure out the height of the row implicitly. I say “might” because while I personally couldn’t get this to work, I concede that there may be a precise set of keystrokes keyed in the correct order that does make it work.
Details left up to the reader
In this example, if we really wanted to save the notes, we have a little more work to do to get the text view’s text into the data model, but that’s another topic altogether. Also in this example, I did not animate the constraint change and I left the row reload animation as “Automatic”, so there’s still room for pieces of personal flair.
If you ever find yourself needing to dynamically resize UITableViewCells, what I’ve laid out here will get you toward the finish line a little quicker.


