

Upgrading a .NET 6 Function App API to .NET 8 Web API
Technology Stack:
- C#
- Bicep
- .NET 6
- .NET 8
- Azure Functions
- Azure Web App
- DevOps Build (via YML)
Premise
A while ago, we decided to use an Azure Function App as a Web Api. That was when .NET 6 was new. To enable that, we had to use used Microsoft.Azure.WebJobs.Host.IFunctionInvocationFilter in our pre-.NET 7 Azure Function API, which was always in preview, and in .NET 7 was deprecated. That filter was used to handle some events around the function methods security:

Let’s not dwell on if that was a good or bad idea. I will say that we did this because we assumed these filters would eventually leave preview and become release. But boy were we wrong.
Upgrade Azure Functions from .NET 6 to .NET 8
The first thing you will probably encounter is that you are running in-process and that nothing works anymore.
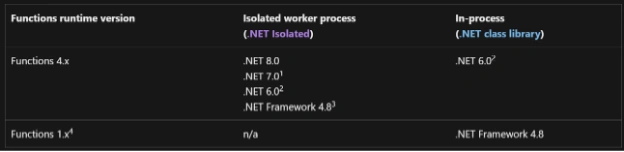
To run a Function in .NET 8 as of 3-25-2024, in-process is not yet supported. Here is a good article for switching to isolated mode: https://learn.microsoft.com/en-us/azure/azure-functions/migrate-dotnet-to-isolated-model?tabs=net8.
Some packages and configurations need to be adjusted, and with that, some of your dependencies may change. For example, [FunctionName] needs to be shortened to [Function], and Startup.cs needs to be replaced with Program.cs.
Something else we encountered was that you won’t be able to use custom personal.settings.json files to store your machine-specific configuration anymore. Instead, you will need to use secrets.json. Check out Ethan’s post on setting up user secrets for more information.
Azure Function App API may not run in .NET 8
As mentioned above, we had some specific requirements around Microsoft.Azure.WebJobs.Host.IFunctionInvocationFilter that was no longer available in .NET 7, which broke our whole security setup, but it will break any setup that requires filters. There are rumors that you can create and register your own custom middleware to replicate the functionality somewhat, but we went the cleaner route to just move away from Azure Functions as an API and use Azure Web API instead.
Upgrade from Functions to Web API in .NET 8
I recommend doing one thing at a time, and first, upgrade your functions to .NET 8.
Once you finish that, create a new ASP.NET Code Web API project in your solution.
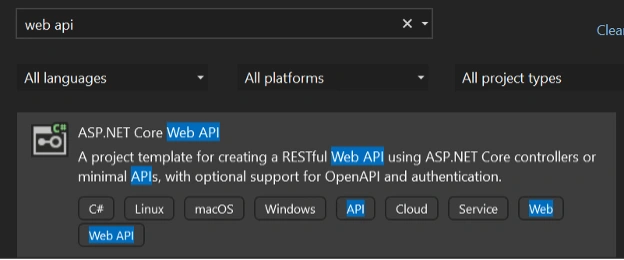
Check out this tutorial for more detailed information on how to create a .NET Core web API.
Move Azure Function App API to .NET Core Web API
This part will not be fun because you may not be able to fully test what you are doing for a while.
- Move
Program.cscontent to the Web API- This should almost be a 1:1 copy of your existing code; just don’t overwrite any boilerplate Web API code yet.
- Move the
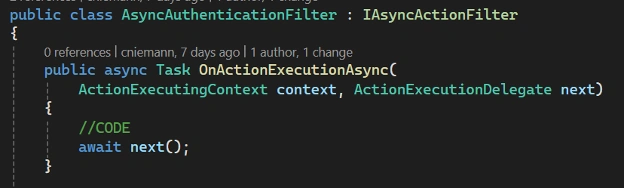
Microsoft.Azure.WebJobs.Host.IFunctionInvocationFilterimplementations, which will now implement IAsyncActionFilter
Below is an example of everything that changed. You will implement a new Filter and use a different context, but you won’t have a cancellationToken. It’s pretty straightforward.
Functions:

Web API:
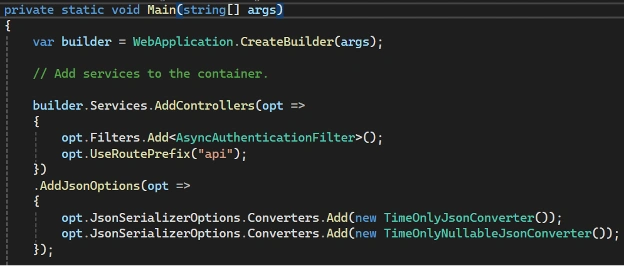
After you have moved your filter, you have to register it in Program.cs:
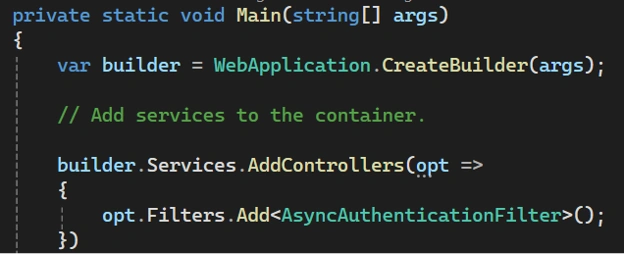
Now this filter is applied to all your methods, like before, but in an API.
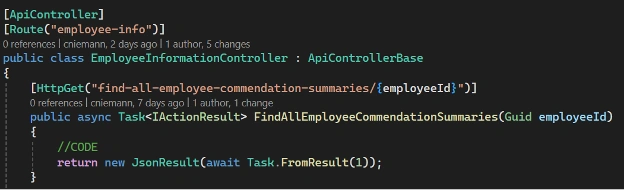
- Move Methods/Controllers/etc.
This may be the most time-consuming step. Below are the before and after of moving one method.
Note:
- Add [ApiController]
- Add [Route]
- Replace [Function] with [HttpAttribute]
- Move the Function Route into the [HttpAttribute]
- Move the Controller route into the controller [Route]
- Instead of using
HttpRequesthttpRequest, you now have access toHttpContext.Request - You can use function parameters now for complex objects
- You may use any other API-specific attributes now
Azure Function:

Web API:
Since you can now use complex objects, you may encounter some mapping issues, as the JsonConverter works a little differently than other C# converters. We had issues with DateTime to DateOnly/TimeOnly conversions and their nullable equivalents, so we had to create custom JsonConverters for each type:


And then register them in our client Program.cs.
- Update
connectionString.- If you don’t already have
TrustServerCertificate=truein your connection string, you may have to add it.
- If you don’t already have
- You should be able to locally test your changes now.
- Be aware that your localhost port may be different now.
Update Deployments (using Bicep and DevOps YML)
This part required the most trial and error. I tried to move from Azure Function to Web API directly, but several details were easy to miss.
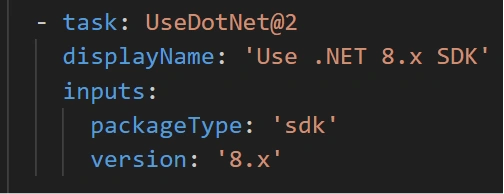
YML updates
Make sure you are using the correct .NET framework:
Next, this is a standard Azure Function App template:

I made the mistake of just updating some names and locations and calling it good. That was a bad idea. You have to update your arguments to account for your specific situation. In my situation, we had to run the Web API on an Azure Web Service based on Linux, so our specific setup needed this:

Without --runtime linux-x64 --self-contained false, the build would create artifacts for several different OSes, and that created duplicates for some of the DLLs. In turn, this caused issues running anything. You know you did it right when your build artifacts folder doesn’t contain a runtime folder.
Bicep Updates
For the most part, you can change the names of your resources if you are replacing them or replicate the setup for the new Web API Resource. This is not a Bicep tutorial, so I won’t get too much into that here.
Specifically, check out the two templates below. They are almost identical, but we had to make some changes to the web API:
Azure Function Template:
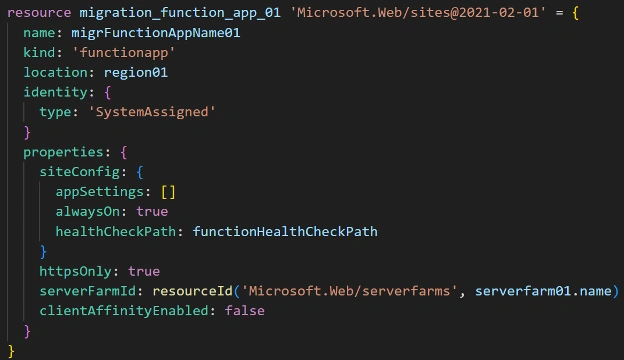
Azure Web API:
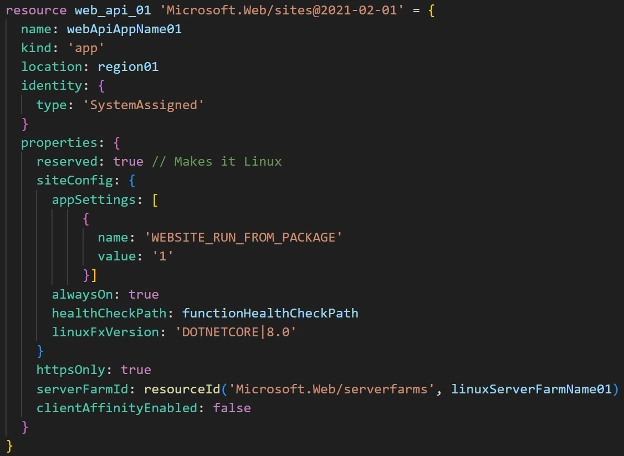
- Add
linuxFxVersion: 'DOTNETCORE|8.0'

This is responsible for setting the correct stack settings in Azure.

- If you run your API from a container, you will probably need this:
- You will need to correct the OS Server Farm.

You may run into Linux/Windows configuration name issues, but they are easy to solve.
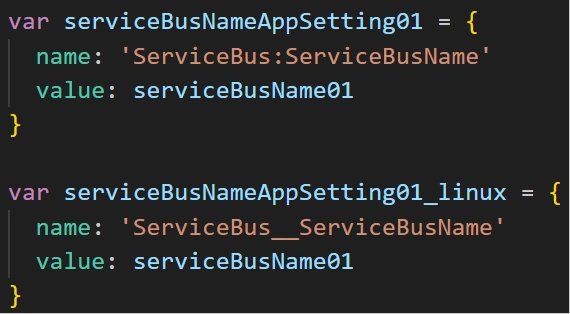
These are equivalent, but you have to use “:” for Windows and “__” for Linux.
The rest of the Bicep changes will be very specific to your setup and most likely replicate what you already did before, so make sure all those are done and test your Bicep from your local machine first.
Notes
- During testing, I found that creating a new resource and then removing that resource may not clean up the roles. You will end up with orphan roles that won’t allow you to create the same resource again. You have to find and clean up those roles. They will show up without a link to a resource they belong to.
- You have a specific SQL database login and role for a web service, and that service has connected to the database at least one time. You delete the service and try to recreate it, but it won’t connect to the database.
- You must remove and re-add the same login to connect again.
- If I were to speculate, I’d guess that SQL stores a GUID for the service on the first connection and ignores the name afterward. But I wouldn’t speculate.


