
Upgrading Projects to SQL 2012: The Good, The Bad, and The Ugly
Experience is always a great teacher. And if I can learn something through experience I like to share it, especially if I can save others any amount of hassle. Case in point: our recent experience with upgrading to Microsoft SQL 2012 and how it affected our projects and nightly builds.
Install
This process is pretty easy for developers, but a little trickier for build masters. Here’s a skeleton of what needs to be done.
- Install SQL Server Data Tools
- Install SQL Server 2012 Express
- Upgrade existing DB projects
- Change master reference path to absolute
- Conversion doesn’t delete old .dbproj and .dbproj.vspscc files
First, you’ll need to install both SQL Server Data Tools (SSDT) and SQL Server 2012 Express on your machine.
Follow the installers and create a new named instance on your machine. I called mine “SQLEXPRESS2012”. Finally, create the necessary databases for your project.
After your databases are created, you will then be ready to upgrade your existing database projects in Visual Studio.
Conversion
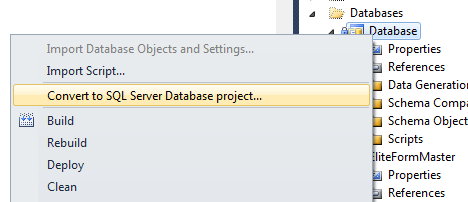
First, convert your database projects to SSDT. After you have SSDT installed, you can right-click on the project in the Solution Explorer and select “Convert to SQL Server Database” project.
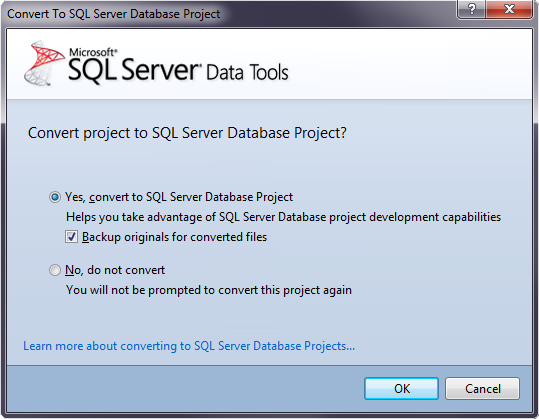
Ensure Yes, convert to SQL Server Database Project and the Backup originals for converted files check boxes are selected.
Click OK.
Verify there were no errors during the conversion.
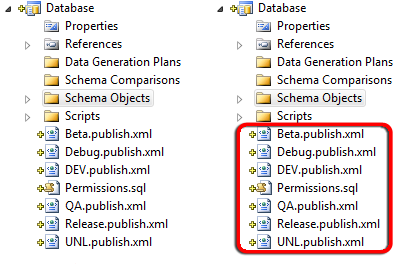
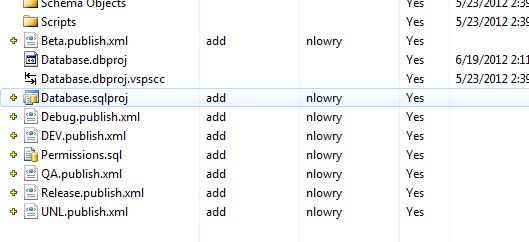
You’ll probably notice a couple things. First, your projects might have moved out of their virtual folders. Simply drag them back in if needed. Second, you have these weird xml files in your project. We will explain these in a bit.
Building
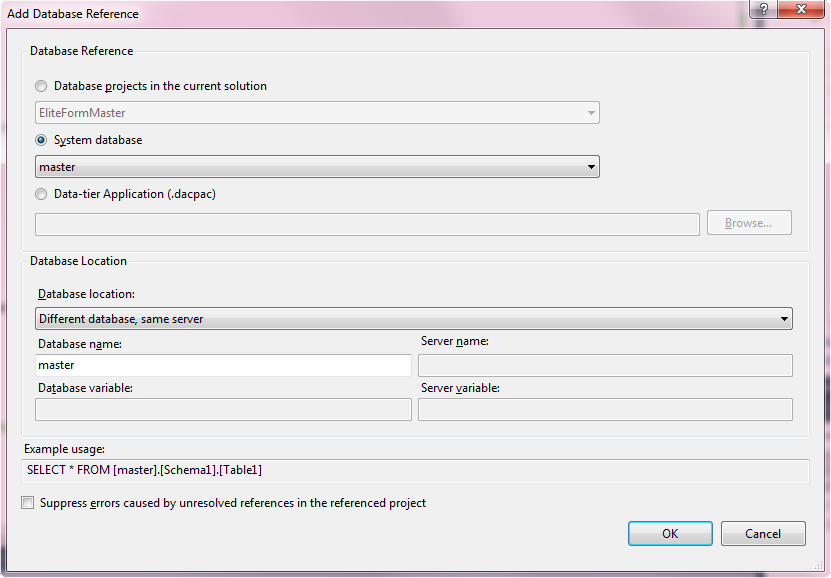
Now, build the database project. But before you do this make sure you check your DB references since they may have changed. We had a reference to the “master” system DB that might need to be changed. To do that, delete the old reference (it probably has a yellow “warning” triangle next to it) and right-click the DB project and click “Add Database Reference…”.
The Add Database Reference box is displayed. Select “master” as the System Database and click OK.
One gotcha we found with shared projects is that SSDT seems to add these references with a relative path. For example, it added this to the end of my database project file.
<ArtifactReference Include=”..\..\..\..\Program Files (x86)\Microsoft Visual Studio 10.0\Common7\IDE\Extensions\Microsoft\SQLDB\Extensions\SqlServer\ 110\SqlSchemas\master.dacpac”>
<HintPath>..\..\..\..\Program Files (x86)\Microsoft Visual Studio 10.0\Common7\IDE\Extensions\Microsoft\SQLDB\Extensions\SqlServer\ 110\SqlSchemas\master.dacpac</HintPath>
Note: This path will be different based on the version of Visual Studio you have installed. VS2012 will be under “Microsoft Visual Studio 11.0”.
This will work well for me, but might not for anyone else that has the solution in a different directory. To fix that, simply add the fixed path to that reference. I replaced the “..\..\..\..\Program Files” with “c:\Program Files”.
Changes to Deployment
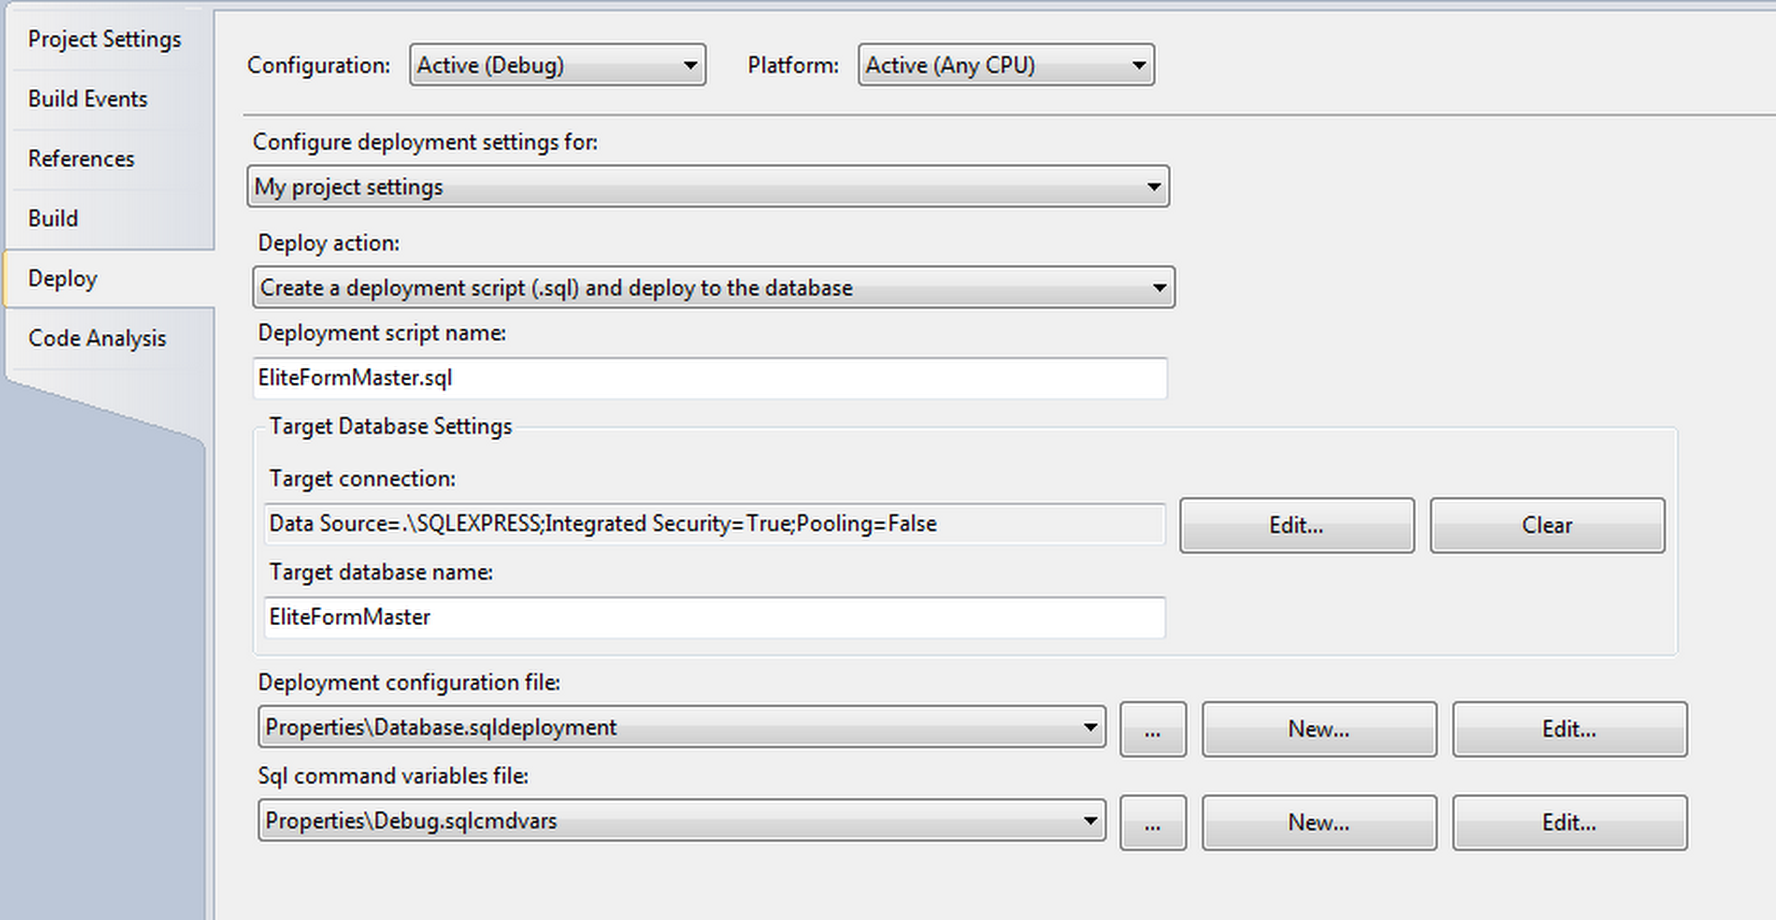
One of the changes with SSDT is the deployment process. Instead of right-clicking the project and deploying using the project settings (like below), different configurations are placed into those xml files we saw above.
The old way:
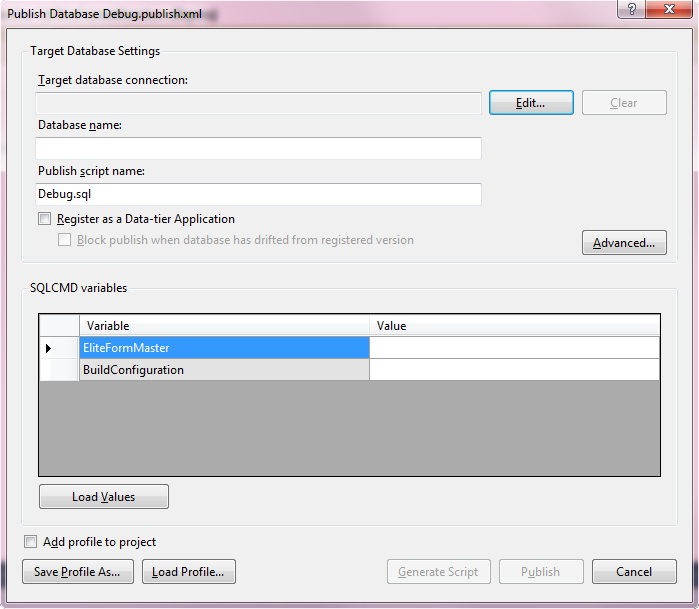
Unfortunately, the SSDT conversion tool doesn’t appear to retain your deployment settings, so we need to double-click on the configuration we want to edit to bring up a deployment dialog.
Specify the appropriate Target database connection and any other necessary variables. Click Save Profile As… and save the xml file.
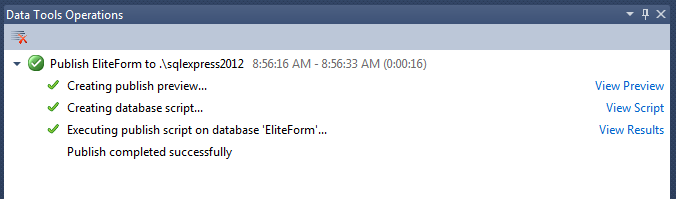
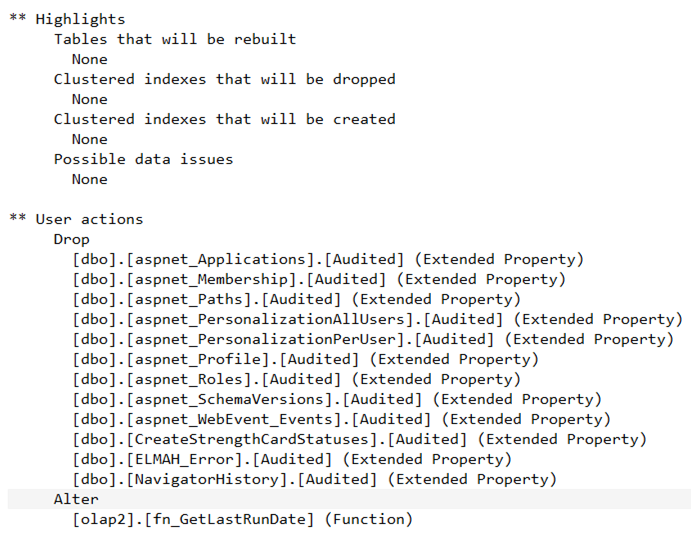
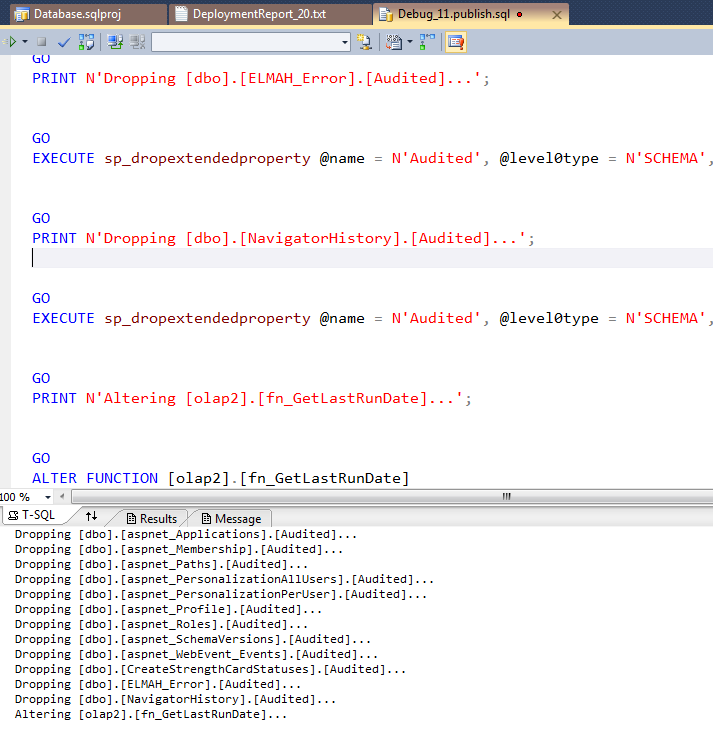
The “Publish” and “Generate Script” are self-explanatory. The new Publish reports are pretty cool and they run in the background. It shows a (human-readable!) preview of what changes it will make and has links to specifics.
The preview and summary reports look something like this:
TFS Gotchas
Here’s a part that’s important for us. The SSDT conversion doesn’t delete the old .dbproj from source control, so go into Team Explorer -> Source Control and manually delete it.
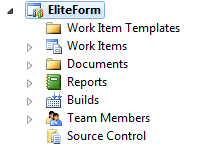
Find your DB project’s folder in the tree.
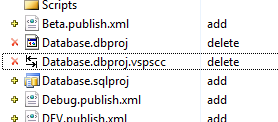
Select the old .dbproj and .dbproj.vspscc, right-click them, and click “Delete”. They’ll now be deleted when you check in (and won’t mess up our custom build).
Next, we need to modify the MSBuild Arguments. Open Team Explorer, expand Builds, right-click the definition you want to change and select Edit Build Definition….
The Build Definition is displayed. Select the Process tab. In the Advanced section, locate add the following to MSBuildArguments:
/p:SqlPublishProfilePath=<YOUR_CONFIGURATION>.publish.xml
That should be all you need to do for right now. The database projects should now magically deploy with the builds on their own now! We used to have a custom script for that, but TFS finally caught up to us.
Pros and Cons of Using SQL 2012 (non-DB engine feature-related)
Pros:
- Our build now deploys the database on its own.
- Don’t have to use our homegrown deployment script anymore.
- Deployment from Visual Studio is easier. Just double click and go!
- More helpful deployment reports.
- SQL Server Management Studio now runs in Visual Studio 2008 instead of Visual Studio 2005.
Cons:
- Have to use all or nothing. SSDT projects can point to SQL 2012, SQL 2008, SQL 2005, or SQL Azure, but that switch can be flipped for just your team build or just your local deployments/builds. We upgraded our QA database for our nightly build to SQL 2012, so all of our developers have to use SQL 2012 on their machines.
- Some people miss the old publish process.
- The file extension for SSDT projects is different than the old .dbproj files. You may need to change some custom build scripts to support the new format.


