SELECT Build Deploy from TFS 2010
TFS has always provided great ways to build your projects and solutions:
- Builds are easily started and reviewed by different members on the team
- Builds are automatically versioned and backed up
- Work items and bugs can be associated with individual builds
Deploying a web application is a slightly tricky matter. These apps are easily deployed from an individual developer’s machine, but it would be nice to publish them with the scheduled build.
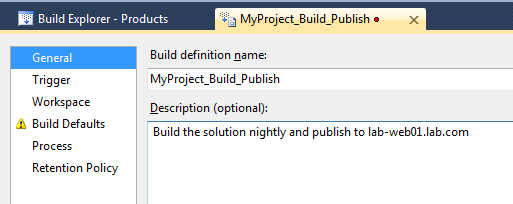
Your first step is to create a new Build Definition. This can be found in your Team Explorer.

Pick a name for your new Build definition name.
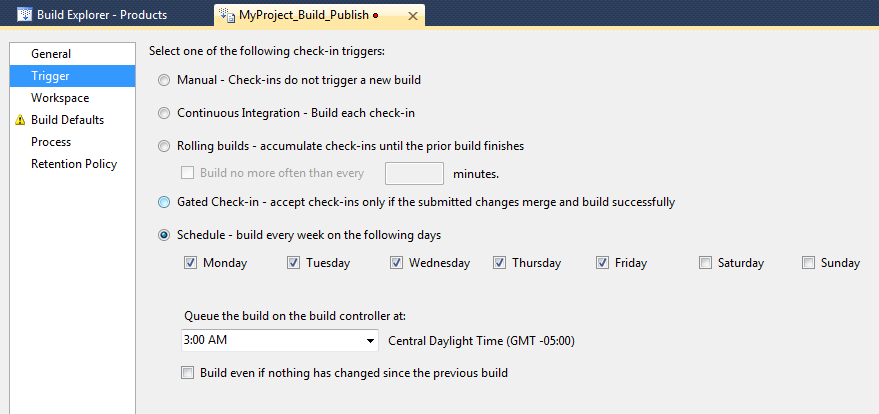
Trigger the build to kick off every weeknight at 3:00 AM.
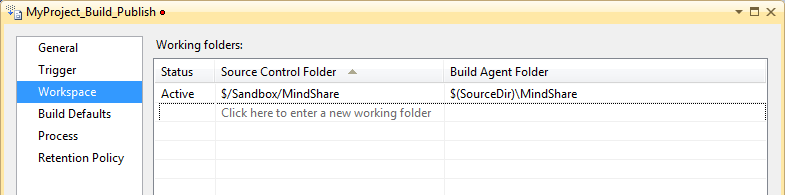
Select the workspace to build. You can also map it to a particular folder on the build machine.
Select a drop location. This will hold the source, binaries, and test results for each build.

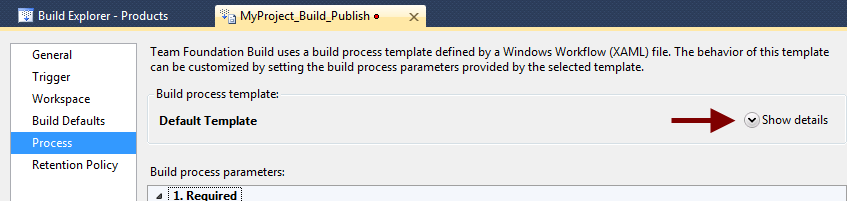
On the Process tab, expand the Show details section.
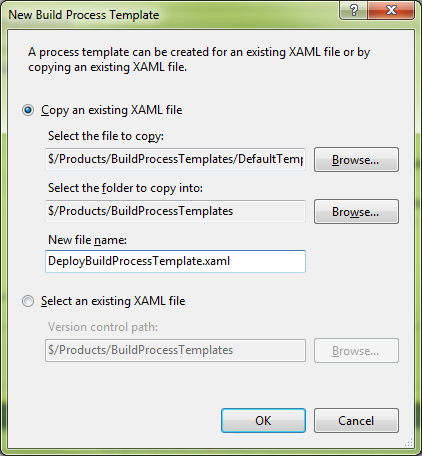
Create a new build template. If you are feeling brave, skip this step and use the default.
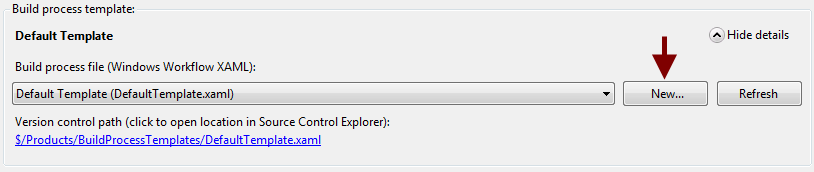
Name the new template.
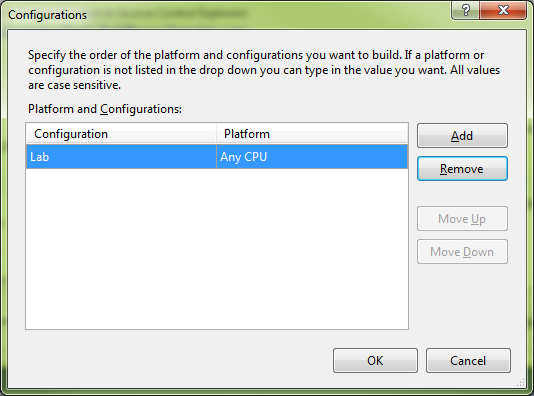
Expand Items to Build and select Configurations to Build. Click the “…” button to bring up the Configurations box. Add a new entry. Use whatever configuration you need (we’re using “Lab” for this example) and click OK.
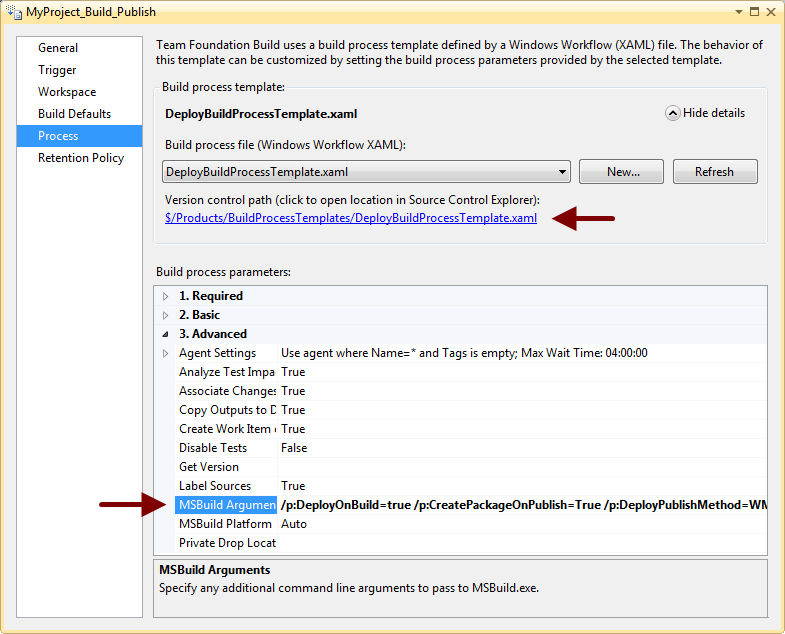
We’ll come back to that new Build Process Template later, for now, lets set the MSBuild Arguments in “Advanced”. We’ll add the following arguments.
- /p:DeployOnBuild=true
- /p:CreatePackageOnPublish=true
- /p:DeployPublishMethod=WMSVC
- /p:MsDeployServiceURL=lab-web01
- /p:AllowUntrustedCertificate=true
MsDeployServiceURL is the URL of your web server. Optionally, you could set “/p:DeployIISAppPath” to be the path on the IIS server. By default it is Default Web Site/<project_name>_deploy. The default value can be set in the Project Settings under Package/Publish Web.
Now save the build definition (Ctrl-S). To save some check-out headaches later, go to the BuildProcessTemplates folder in source control to refresh and get latest of the entire folder.
Next, we will edit the build process template. These are now available as Workflows. No more XML! Click the blue link to the new process template you created to open it up in Source Control Explorer. You can also directly open the file from Source Control or by right-clicking Build in Team Explorer. Open the template (it might take a little while to load). You’ll see all sorts of tasks going on with this build. It’s not simple. We’re interested in some things on the bottom half of the workflow, specifically in “Try to Compile the Project”.
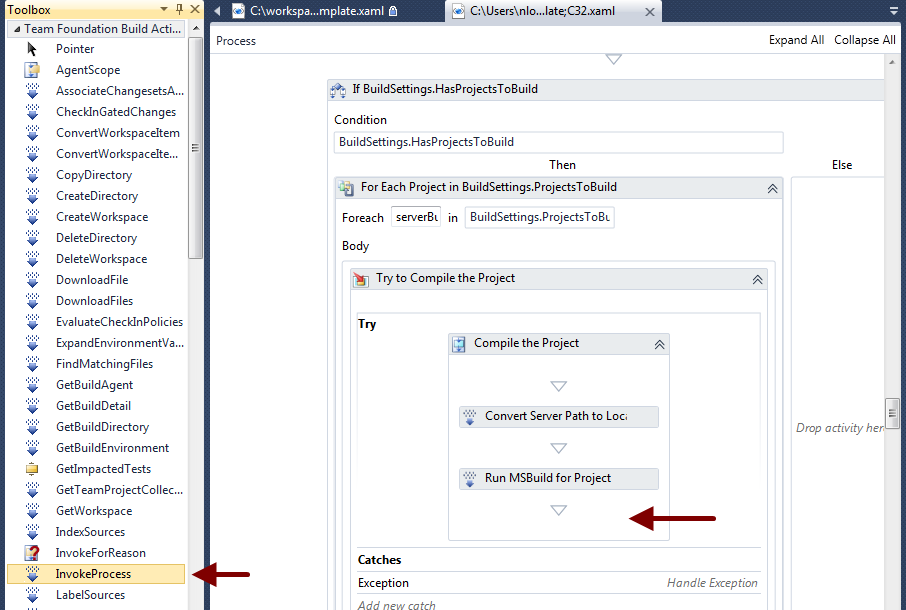
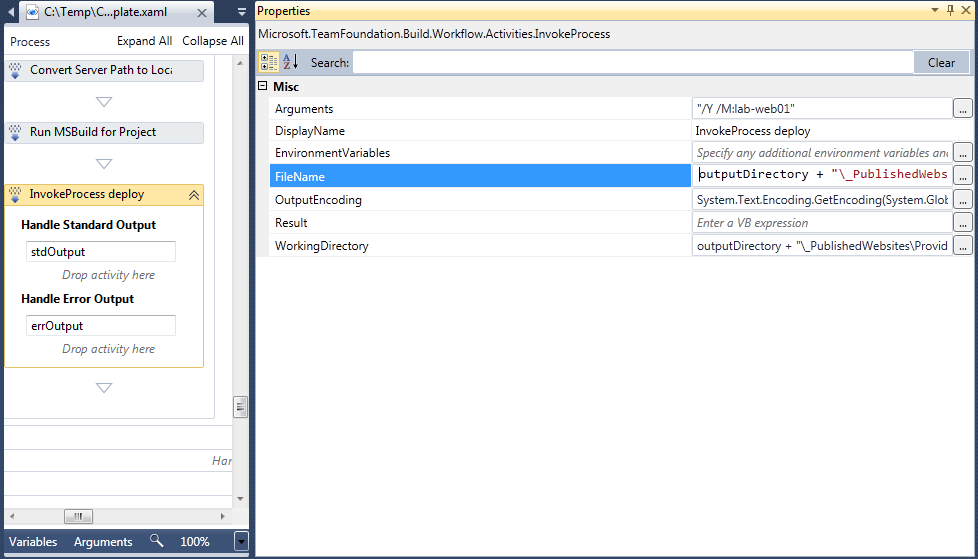
MSBuild provides a deploy script for us, but we need to invoke it. We’ll go to the toolbox and grab Invoke Process from the Team Foundation Build Activities group and drop it in after the Copy Directory item. We’ll also set some properties on it.
- Arguments=”/Y /M:lab-web01″
- FileName =outputDirectory + “\_PublishedWebsites\ProviderPortal_Package\ProviderPortal.deploy.cmd”
The /Y argument tells it to actually deploy (/T is to do a whatif/test deploy). The /M argument specifies the machine to deploy to. The FileName should point to the generated deploy script in your project’s directory. Our project is named ProviderPortal.
Install IIS Web Deploy on both the build and web machines. Make sure you choose the Complete installation on the web server. It needs to install the Web Deployment Agent Service. You will also need to manually start this service on the web server. I’d also suggest setting it to start automatically. This service will allow remote deployment.
Now the site should deploy with each Team Build.
There is a PDC talk and NerdDinner example from MIX 10 on the subject. Our example build process file is also available here.
Links & Files: