Getting Started with Monorepo
In my previous post, I covered my quest to build a shareable component library, using Vue 3. In this post, I will cover taking the current library and turning it into a Monorepo that can handle multiple libraries with Lerna.
Prep the Repo
- We will need
npm i --global lernafor this.
- Add
workspaces.- Lerna prefers if you use workspaces, and npm makes that pretty simple. Suppose we want 2 packages in this repo. Run
npm init -w ./packages/mainandnpm init -w ./packages/bravo(pick any names you like). - This will create a new folder /packages, but also register the workspaces in your
package.jsonfile.
- Lerna prefers if you use workspaces, and npm makes that pretty simple. Suppose we want 2 packages in this repo. Run
- In package.json change this:
To this:
- If you are continuing from where we started, it’s time to move your src folder into the package(s).
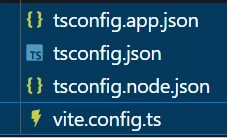
- Additionally, you will want to move the following files from your root to the package/name folder.
- Copy contents of your
package.jsonfile.- You can copy everything. Feel free to keep the name, and you can remove the entry for workspaces. It should look like the original
package.jsonfile otherwise.
- You can copy everything. Feel free to keep the name, and you can remove the entry for workspaces. It should look like the original
- Update root/package.json for Lerna.
- The root
package.jsonfile is now here just for Lerna, so this is the new content:
- The root
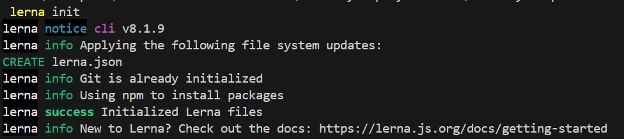
- Initialize Lerna (will add
lerna.json). This step will fail if you don’t have workplaces or if you have twopackage.jsonfiles that specify the same name.lerna init
- Make sure all dependencies are installed.
npm install- A lot of folders and config files have moved, just to be safe.
- Run the first full build. For simplicity, I would simply add the contents from packages\main to packages\bravo, and change the name in the
package.jsonfile. It can all be the same right now, but we can’t build without having all directories working.- Run
npm run buildin the root folder.
- Run
Note: You have a package.json file in the root folder AND in each packages folder, you have different npm run commands in each location, so be aware of where you are running. Also know that you can run each command to verify that the individual projects are working.

- To use the packages you created, you can install the locally exactly like we did before with
npm install <path to library>/packages/name.- If you don’t have a
package.jsonfile inside that directory, you did something wrong.
- If you don’t have a
And that’s it! If you want to add more packages, you can just add more workspaces and fill in the package files like above.