

Using Azure to Securely Restore a MySQL Database
We had a need to move an on-premises MySQL Database to an Azure Flexible Server MySQL database. We could have taken the insecure path of sending a backup of the original database to a developer and restoring it from their local machine, but that would have led to customer data on their machine.
We were able to produce a more secure way by combining SFTP access to an Azure Storage Account to safely transfer the backup file and Azure Cloud Shell to run restore in Azure directly.
The steps below detail the process of moving a MySQL Database from on-premises to Azure without customer data ever touching a developer’s computer.
Create Storage Account
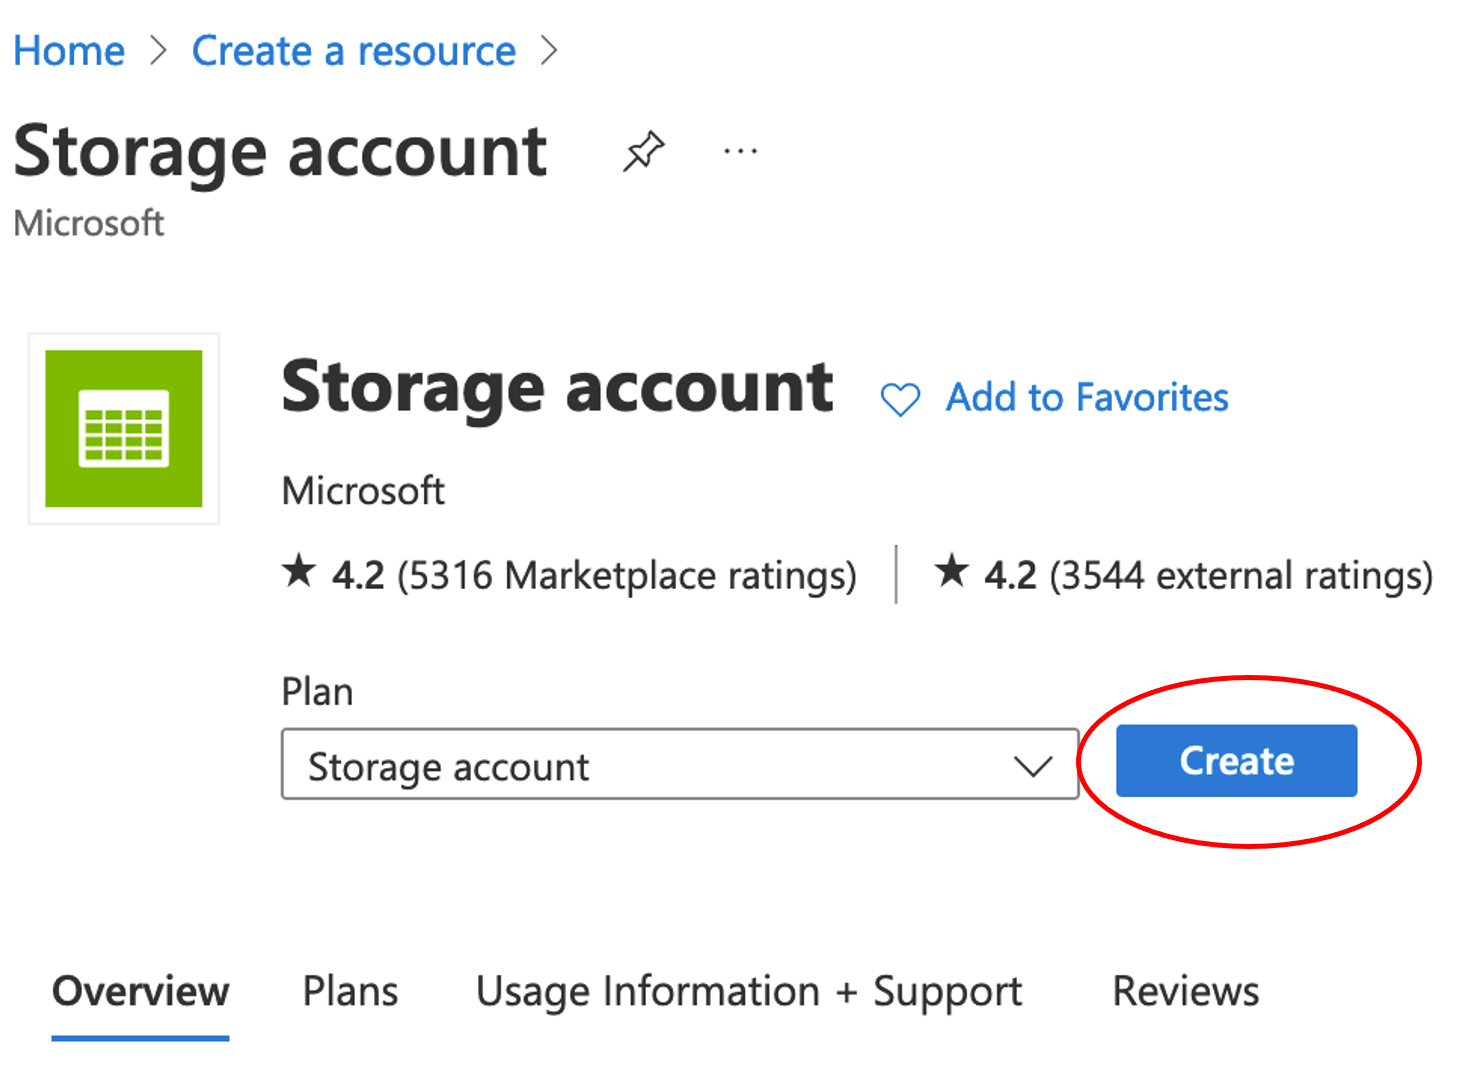
From the Azure Portal home page. click Create a resource.

Search “Blob” and click Storage account.

Click Create to start the Create Storage Account wizard.
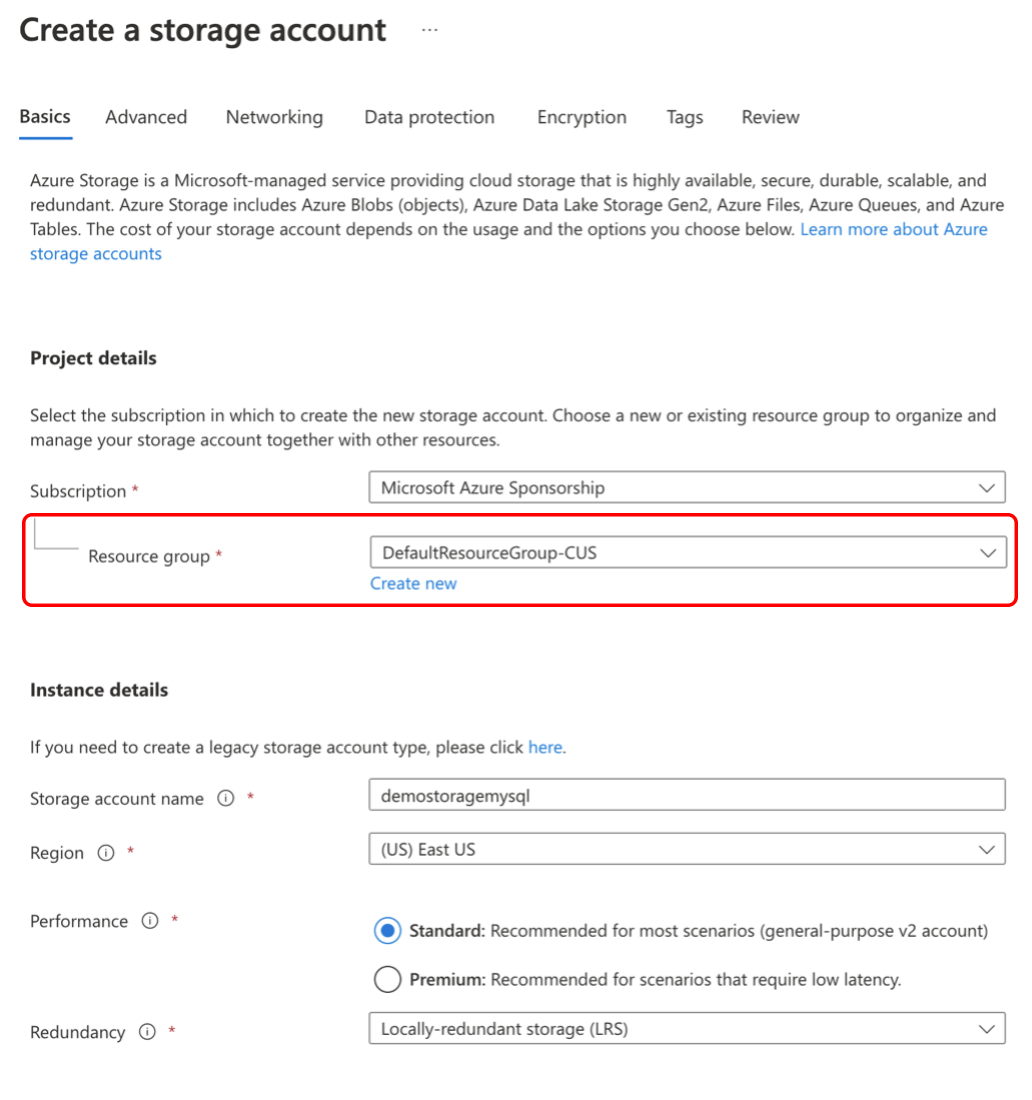
Choose the Resource group that MySQL Database lives in `DefaultResourceGroup-CUS`.
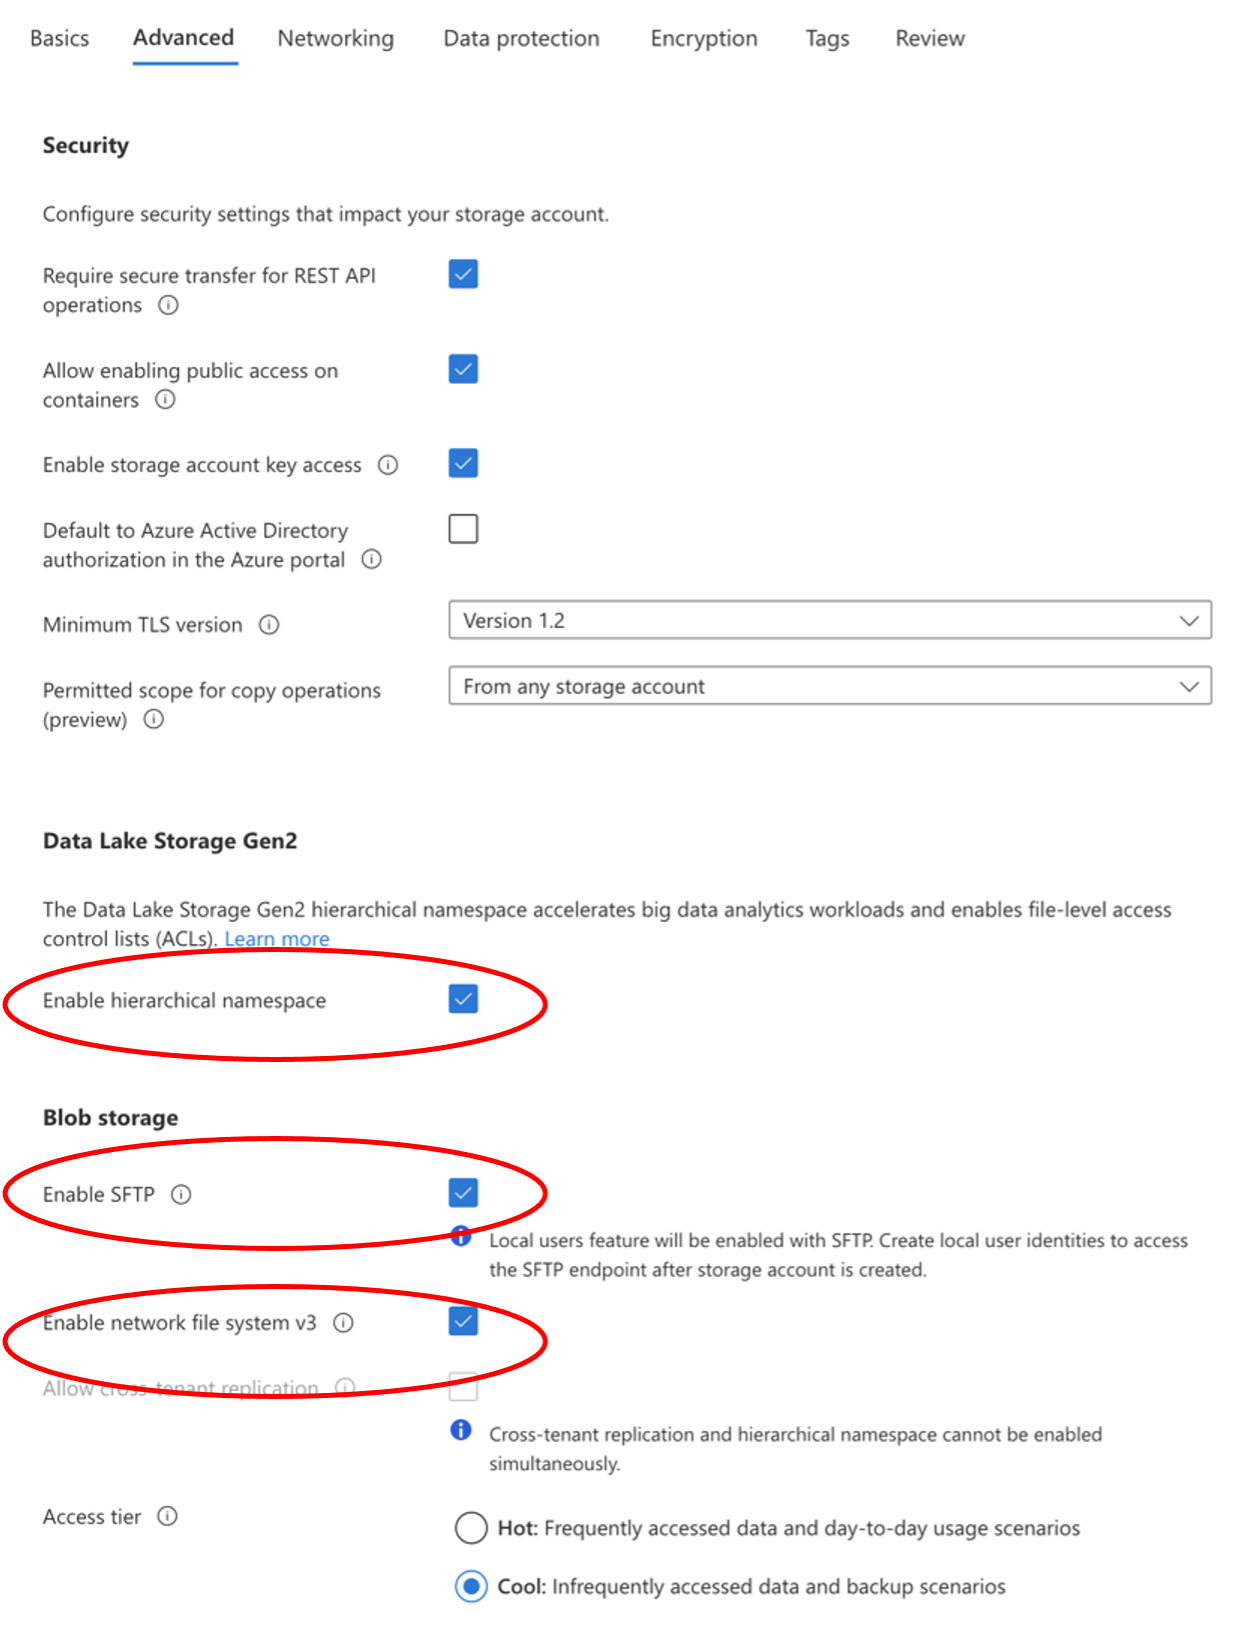
Go to the Advanced tab, and enable the following:
- Enable hierarchical namespace
- Enable SFTP
- Enable network file system v3
Complete the wizard to create the storage account.
After Storage is Set Up
Create a container within that storage account. Click Containers and give your container a name of `db-scripts`.

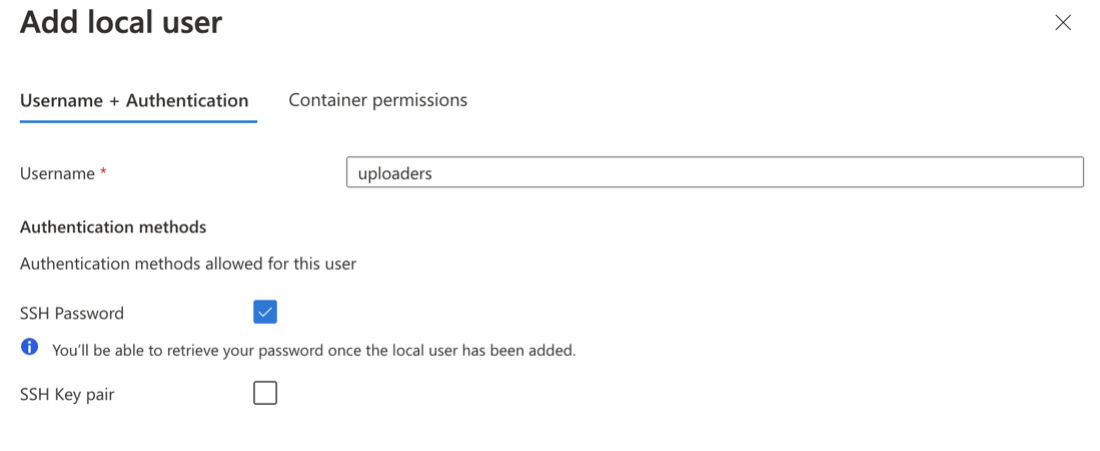
Under Storage Account, click SFTP and click Add local user.
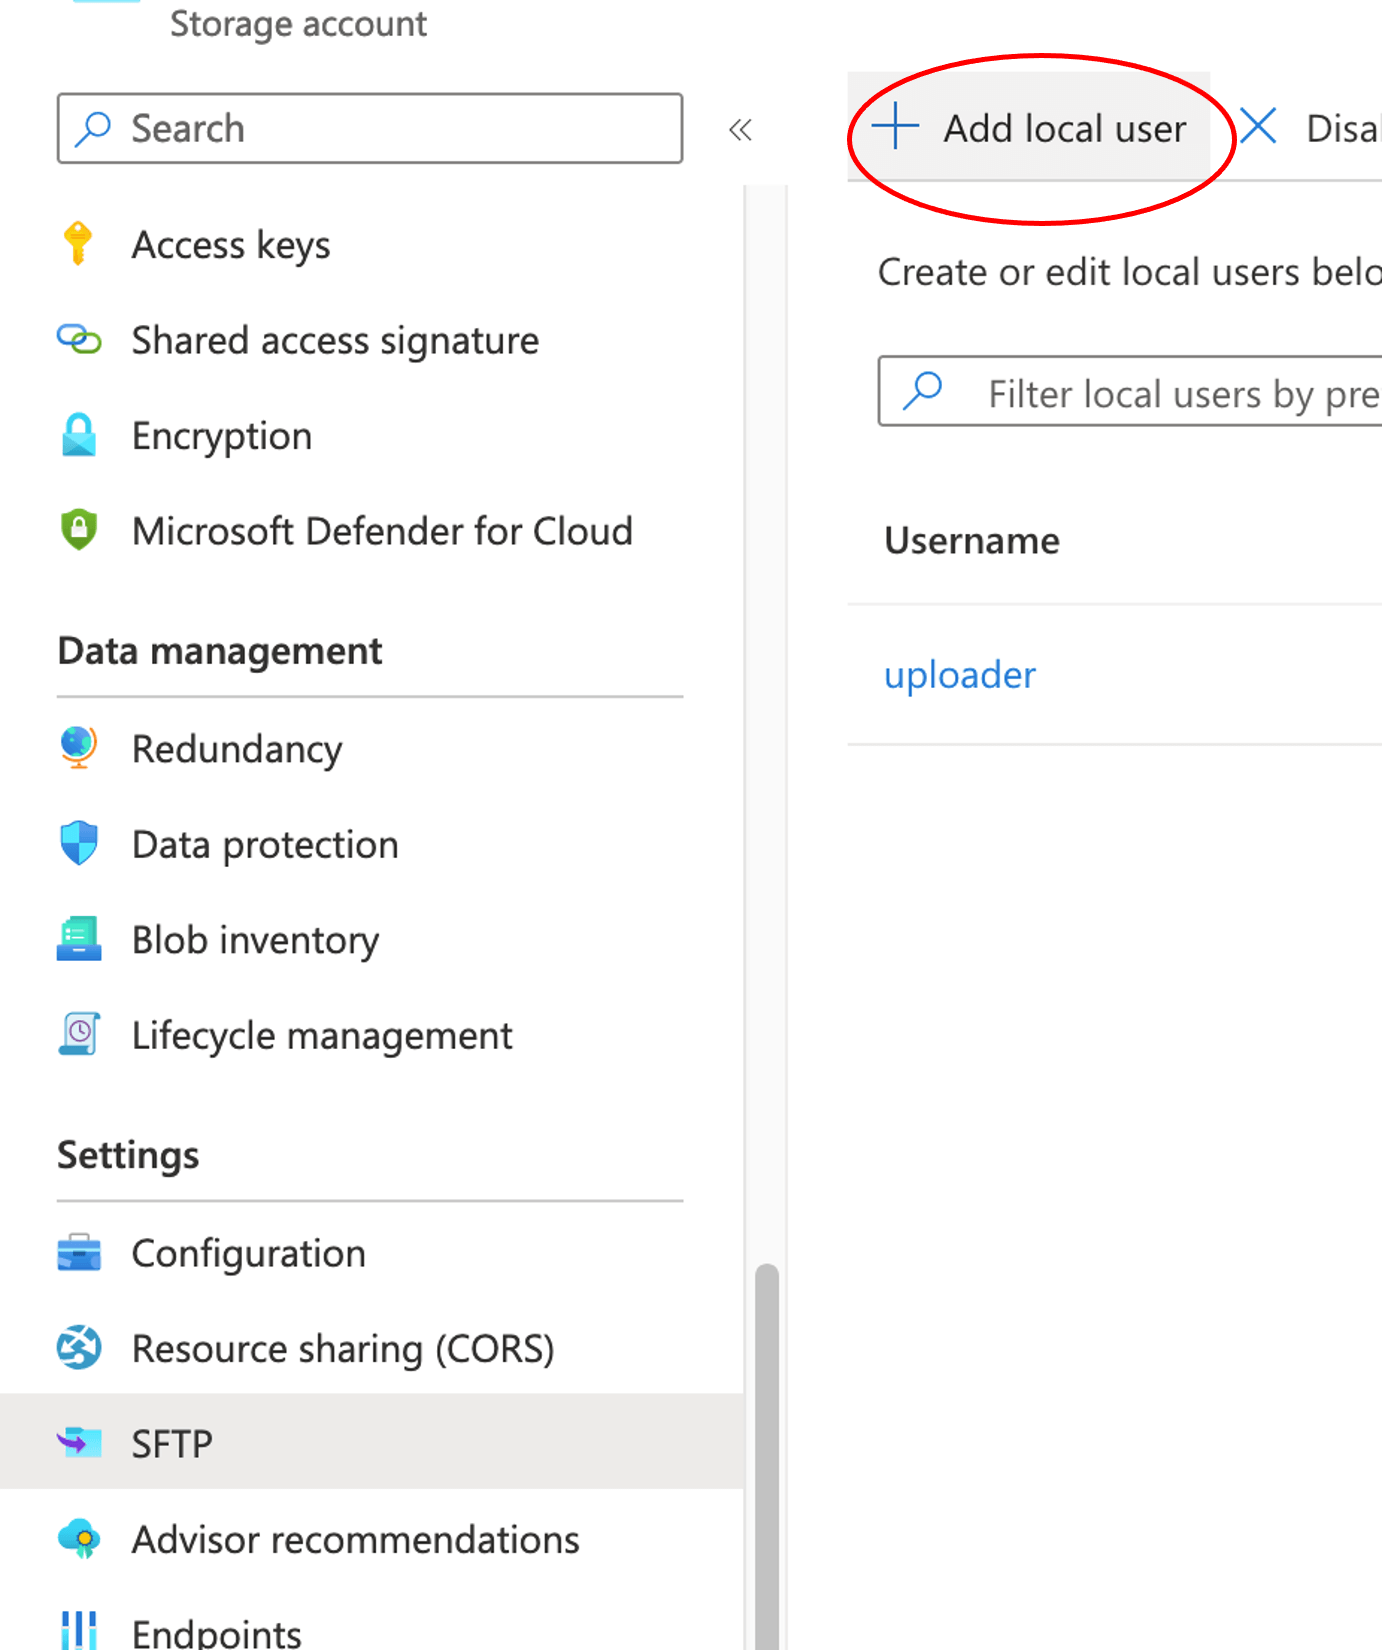
Enter a Username (e.g., `uploaders`) and select SSH Password.
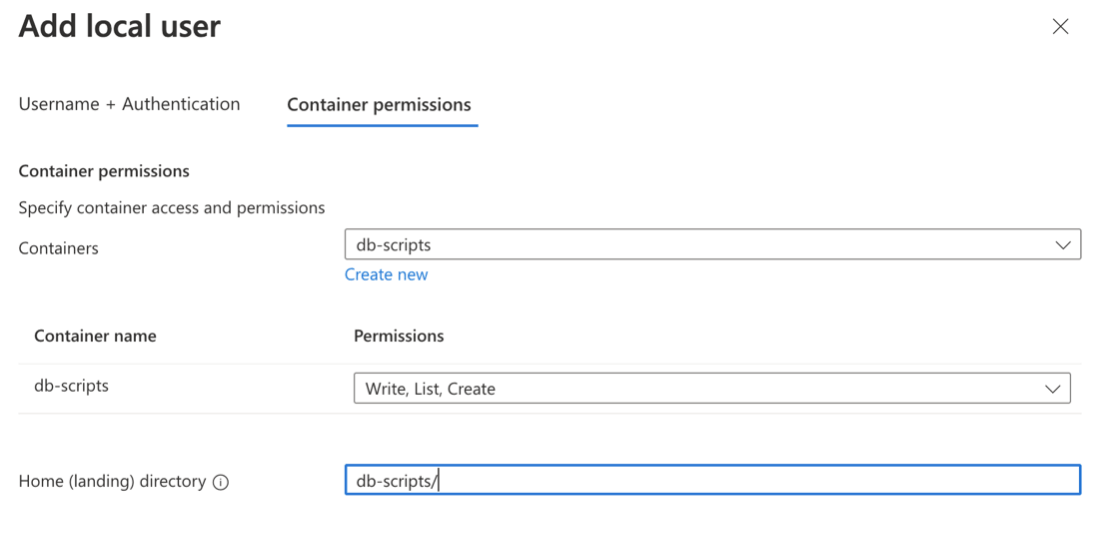
Go to the Container Permissions tab and complete the following:
- Containers: `db-scripts`
- Permissions: `Write, Create, and List`
- Home (landing) directory: `db-scripts/` or the same location as your container
Click the Add button.
Save the generated password in the password manager of your choice.
Copy out the connection string for the user to be used in SFTP commands (e.g., `teststorage.uploader@teststoragge.blob.core.windows.net`).
Use SFTP to Upload Restore Script File
Now we are ready to securely transfer the backup file from the original server to Azure. Note that the username will be the part of the connection string before the @ symbol (e.g., `teststorage.uploader`).
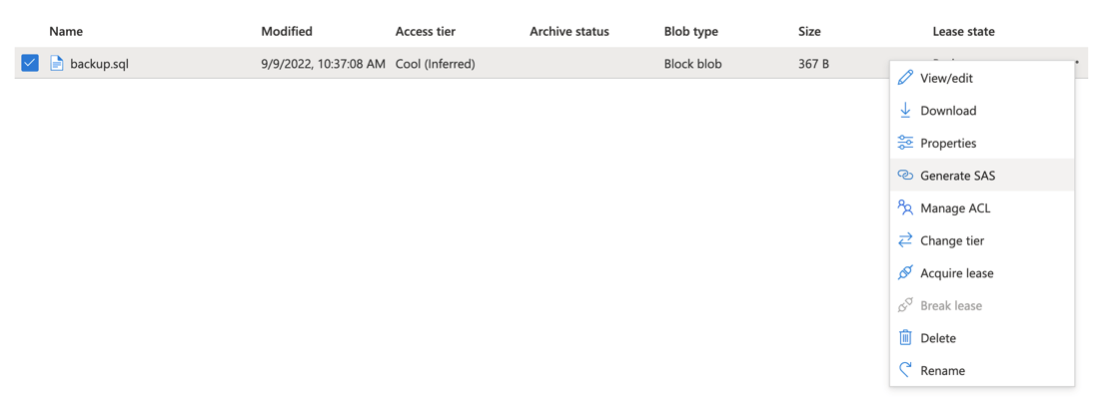
After the SFTP upload has been completed, we should be able to see that the backup file is in the `db-scripts` container. We can now work toward restoring from the backup file.
Generate a Secure URL for the Restore File
We want to copy that restore file while keeping access to it secure.
Navigate to the backup file within the storage container. Click the 3 dots context menu and click Generate SAS.
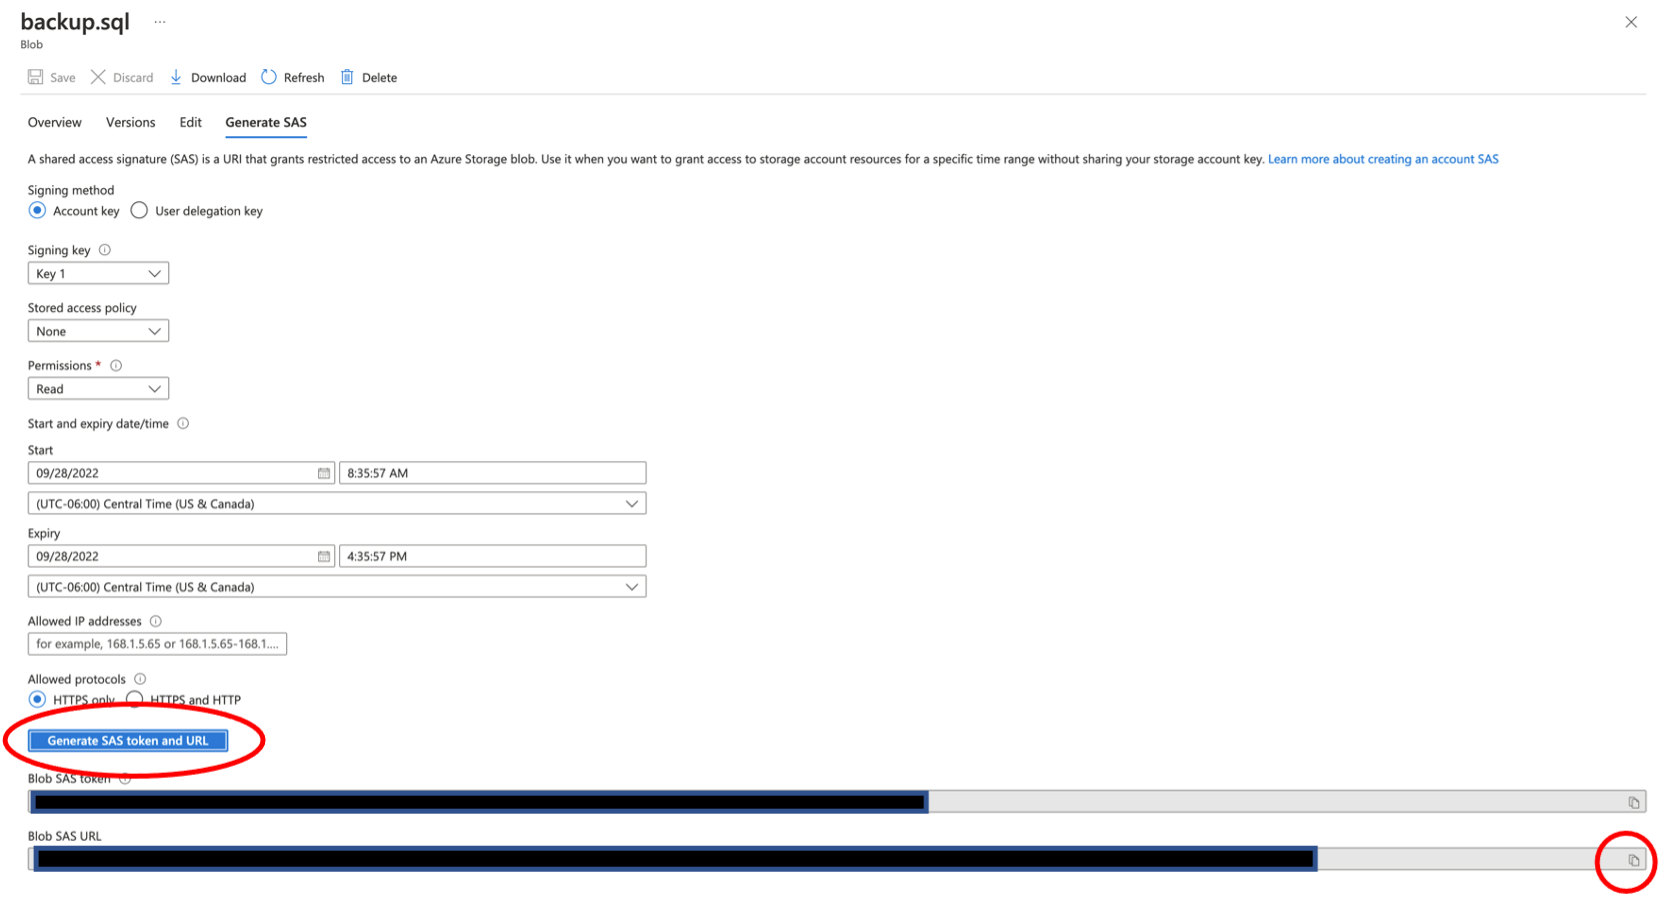
Adjust settings as needed, although the defaults should work.
Click Generate SAS token and URL, and copy the Blob SAS URL.
Next, we are going to use the Azure Cloud Shell to copy that file where our MySQL server can use it.
Restore DB from SQL Script
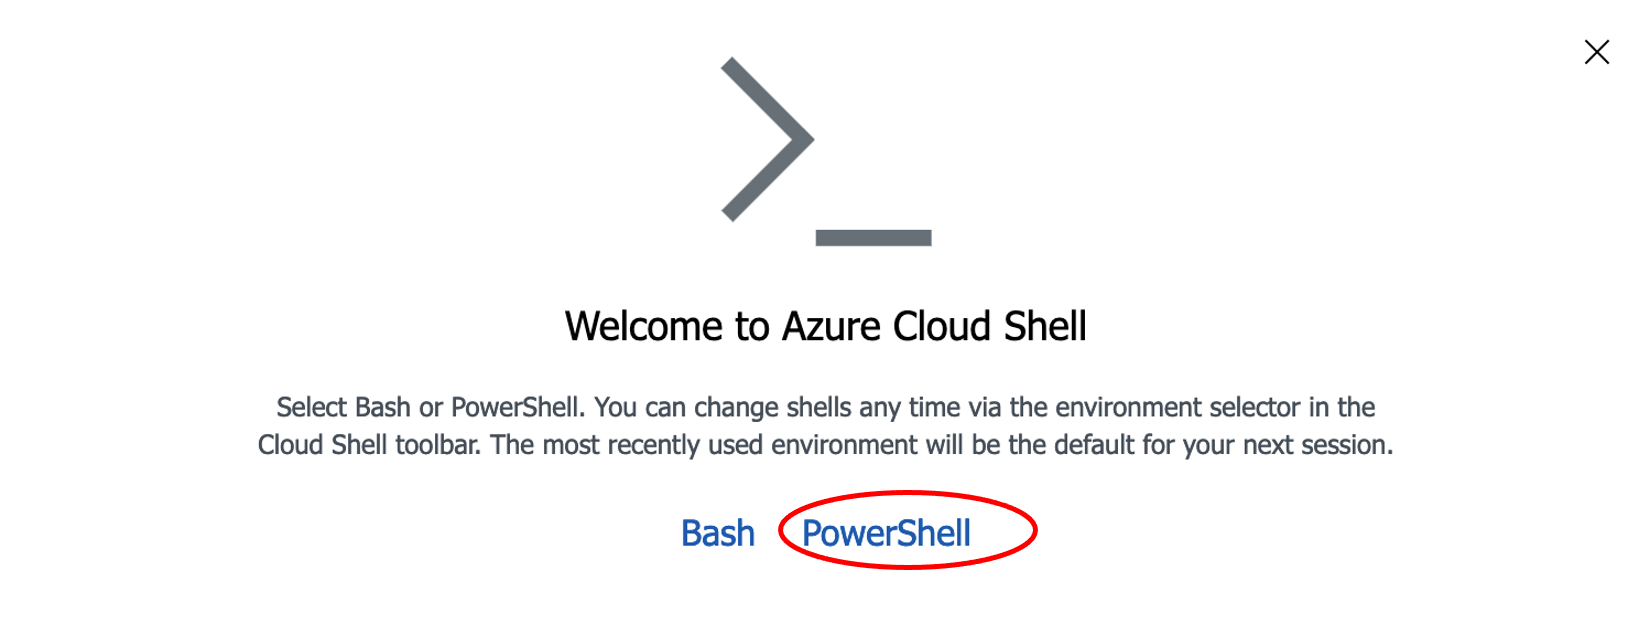
Open the MySQL DB resource in Azure. Open Cloud Shell to start a command prompt in Azure.
Click PowerShell as the language option.
Click Show advanced settings.
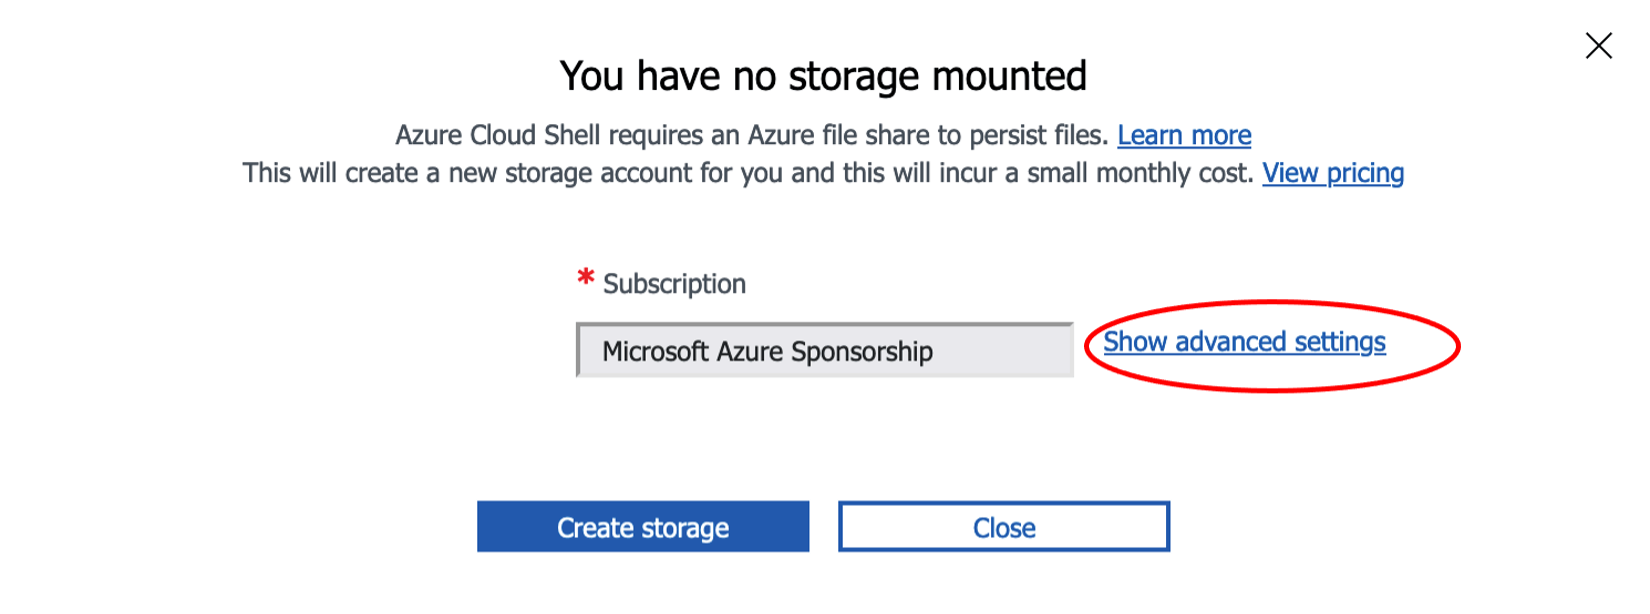
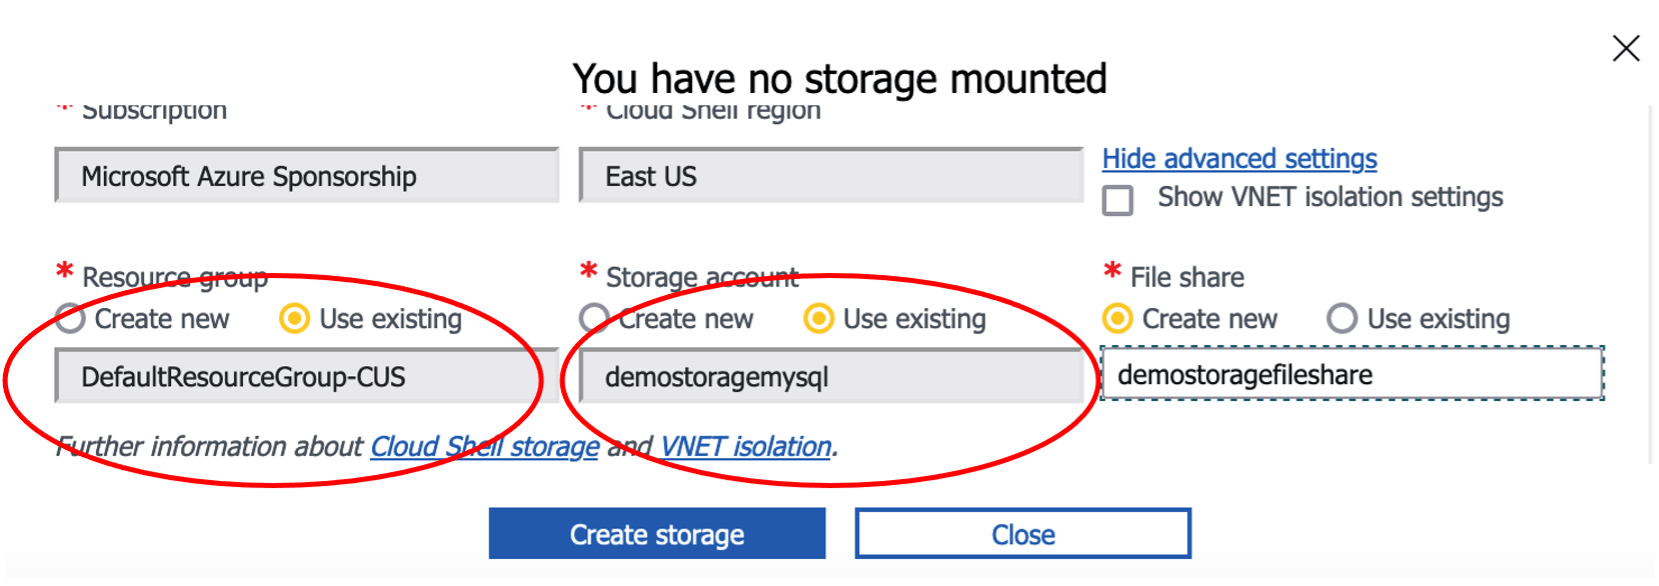
The Cloud Shell storage account should be in the same Resource group as the MySQL server (e.g., `DefaultResourceGroup-CUS`).
For the Storage account, select Use existing and then select the account with the restore script (e.g., `demostoragemysql`).
Enter a name for the File share to complete the setup of Cloud Shell (e.g., `demostoragefileshare`).
Click the Create storage button.
Copy the sql file to the Cloud Shell by running this command:
azcopy copy
Get the connection command to log into MySQL. Click Connect in the Settings section of the MySQL resource in Azure.
Expand Connect from browser or locally and copy the command displayed (e.g., `mysql -h mysql-server.mysql.database.azure.com -u admin -p`).
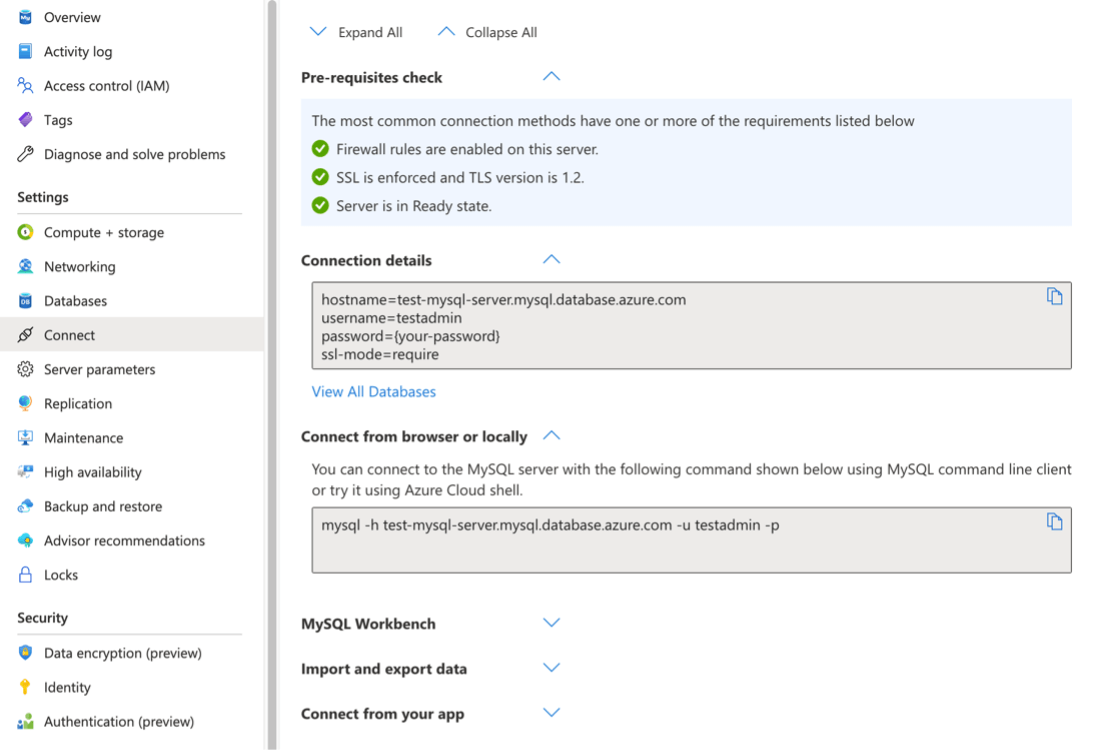
Paste and run the command in Cloud Shell.
Enter the password for the admin account.
Restore the database using the following sql script command:
source backup.sql
That is, it! We have moved an on-premises Database to an Azure Cloud Database securely by leveraging SFTP to an Azure Blob Storage container and the Azure Cloud Shell to execute SQL scripts without ever needing to risk customer data ending up on a local computer.


