

How To: Embed Power BI in a Web Application
I was working on a project recently where we needed to embed a Power BI report into a .NET web application. In talking with one of our other engineers, I quickly got the feeling this might be a fairly involved endeavor, and that it would take some trial and error to get everything configured correctly. Along the way, I jotted down my steps in case they would prove helpful to anyone else needing to embed a Power BI report.
At a high level, I needed to create an App Registration in Azure, update some settings in Power BI, and configure my .NET web application to load the report. What follows are the nitty-gritty steps to make it all come to life.
Note that there are a few prerequisites I had in place for this specific project:
- Power BI Pro license (I was able to use the free trial to set this up)
- Active Directory administrator permissions or have an administrator grant the needed API permissions listed later
- Power BI Administrator to enable service principles to use the Power BI APIs as described below
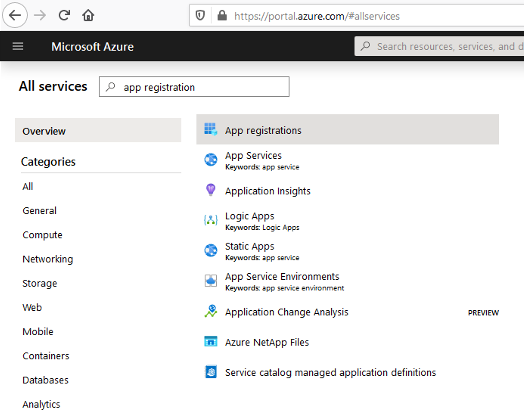
Start by opening the Azure Portal and creating a new App Registration (All Services -> App Registrations).
On the App Registrations page, click New Registration.
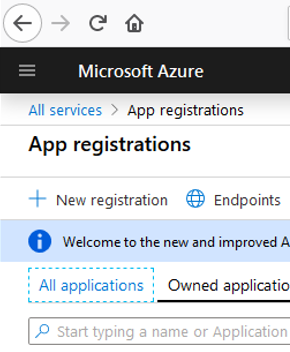
At this point, only the Name needs to be specified.
Click Register.

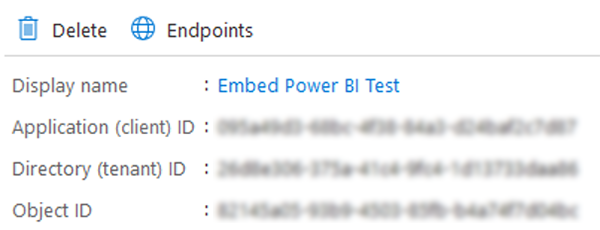
A new page is displayed for your new application. Take note of the “Application (Client) ID” and “Directory (Tenant) ID” supplied on this page as they will be needed later to configure the settings for the Application.
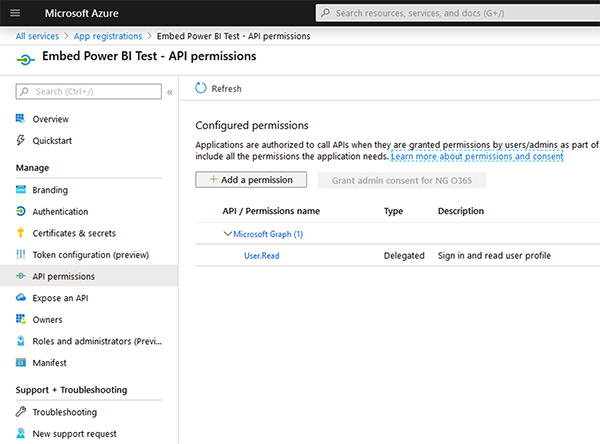
Next, we need to update the API Permissions. Click API Permissions.
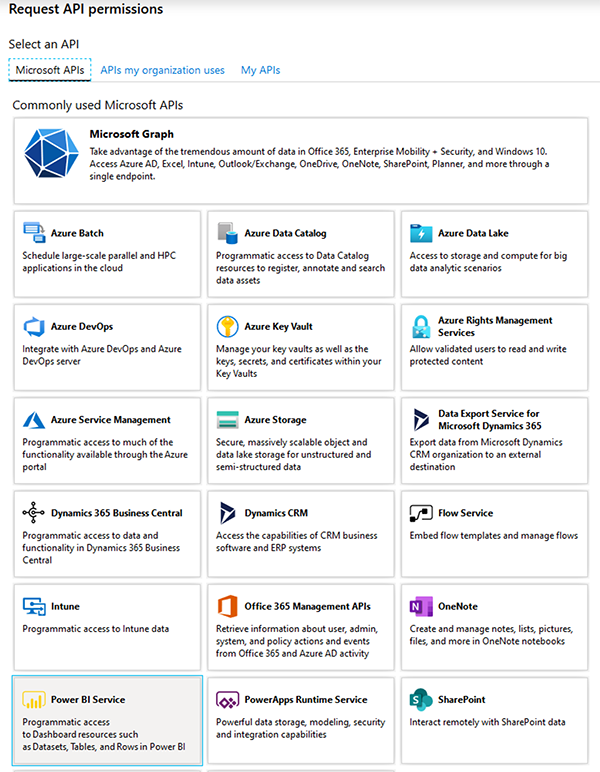
The API Permissions page is displayed. Click Add a permission.
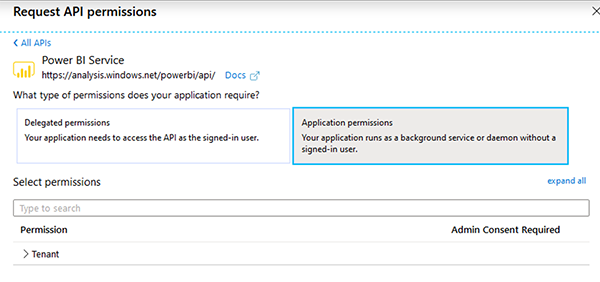
Click Power BI Service.
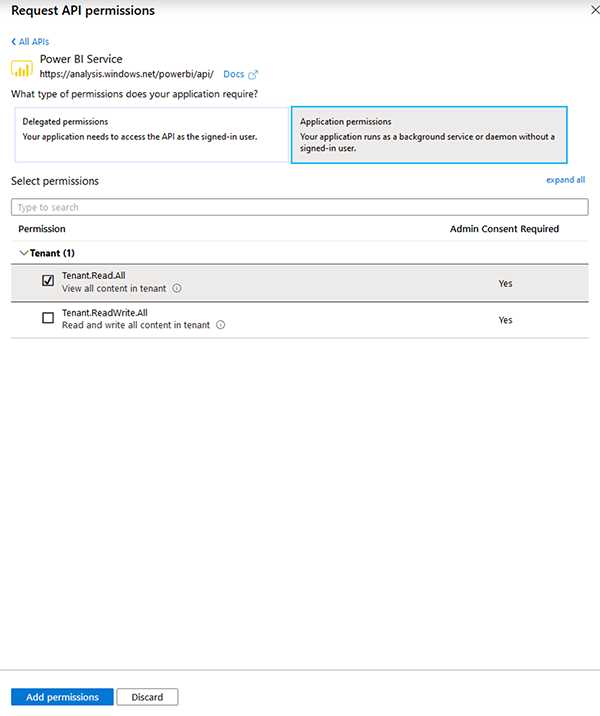
Click Application permissions.
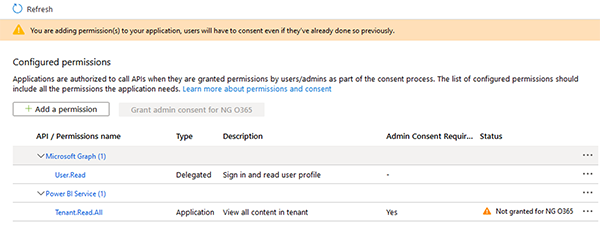
Select Tenant.Read.All, and then click Add permissions.
At this point, an Active Directory Administrator needs to Grant Consent for this App Registration. Click Grant admin consent for <organization>.
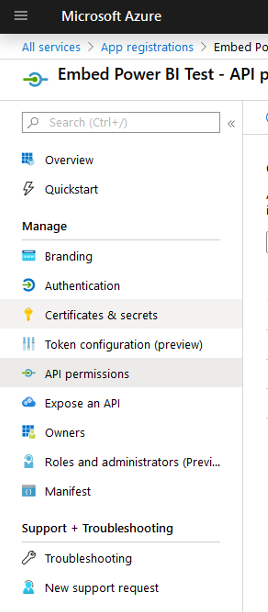
Now we need to create a new Client Secret for the App Registration. Click Certificates & secrets.
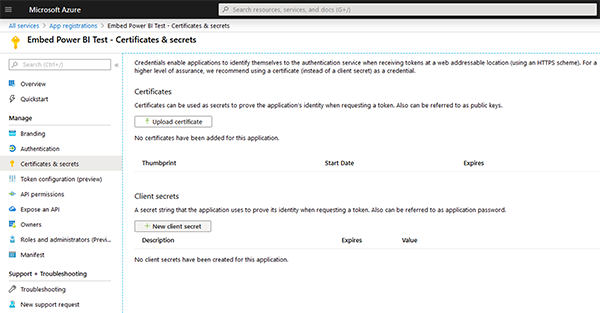
The Certificates & secrets page is displayed. Click New client secret.
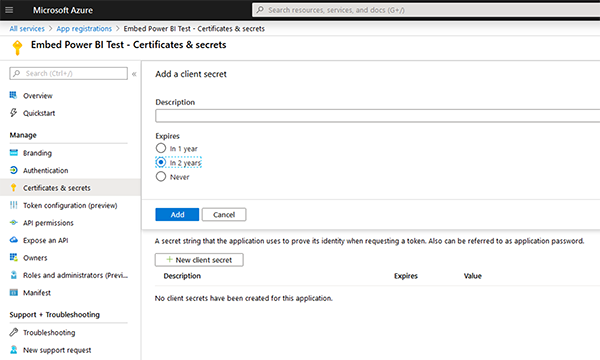
Specify an expiration for the secret and click Add. Note that a new secret will need to be created when this one expires. Repeat this step at that time.
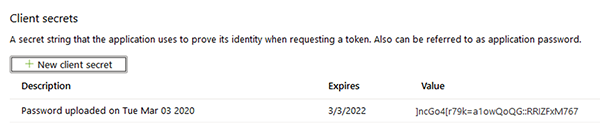
The new secret is now listed on the Certificates & secrets page. Note its Value as we will need it to configure the Application’s settings.
Now it is time to open the Power BI Admin portal. This is where we allow service principals to use Power BI APIs. Here is more information on embedding Power BI content with service principals and application secrets.
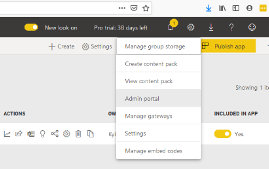
Service Principals need to be enabled to use Power BI APIs. You can do this by going to My Workspace, clicking Tenant settings, navigating to the Developer settings section, and toggling Enable for Allow service principals to use Power BI APIs.
You may want to apply this to a specific security group in your Active Directory. If you do this, the App Registration that you created will need to be added to that group.

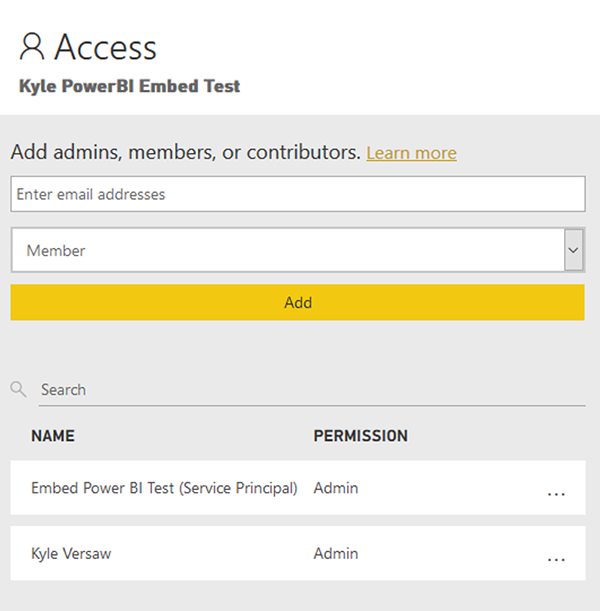
Next, we need to add the App Registration as a user on the Power BI Workspace.
Now it is time for some configuration. Note the Workspace ID from the address bar. This value immediately follows “groups” and ends at “list”.
![]()
Next, we need to note the appropriate Report’s ID from the address bar. This value immediately follows “reports” and ends at “ReportSection”.
![]()
You can download Microsoft’s sample code and plug in the values you have noted along the way:
- Application (Client) ID
- Directory (Tenant) ID
- Client secret Value
- Workspace ID
- Report ID
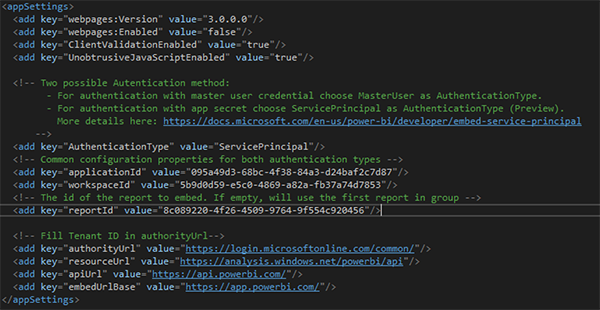
There are several examples included in that repository. Use the App Owns Data solution found in .NET Framework > Embed for your customers. In the web.config file:
- Check that AuthenticationType is set to ServicePrincipal
- Update applicationId to the one copied from the App Registration
- Update workspaceId to the Power BI workspaceId
- Update reportId to the Power BI report’s Id
In the ServicePrincipal section:
- Set applicationSecret to the value copied from the App Registration’s client secret
- Update the tenant to the Directory Id copied from the App Registration

Now run the sample project to see your report.
Hopefully, these steps will provide some guidance about how to embed a Power BI report into a web application. If you have any questions, leave a comment below.


