
Provisioning Your First Azure Service Fabric Cluster
In preparation for an upcoming user group presentation about the benefits of the Service Fabric programming model, I needed to stand up a new cluster in Azure and deploy our demo application to it. Microsoft provides lots of great articles to help with this task, but I had to collect a lot of information to complete what I needed.
In this post, I will do a complete walkthrough of how to provision a new cluster in Azure that is ready to have an application deployed to it.
NOTE: This purpose of this cluster is for testing and demonstration. If creating a production cluster, please follow all security best practices to secure your cluster.
Create a New Cluster in Azure
Log in to the Azure portal, click “Create a resource” in the top left corner, and search for “Service Fabric Cluster”.
Step 1: Basics
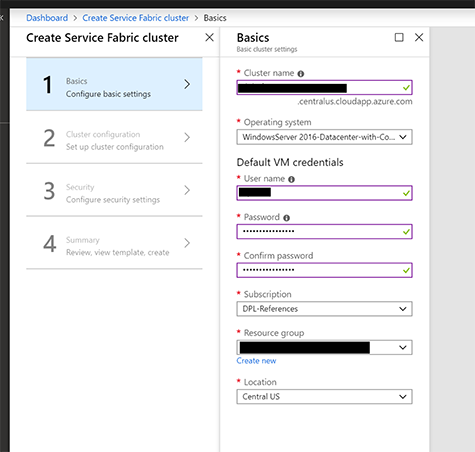
Step 2: Cluster Configuration
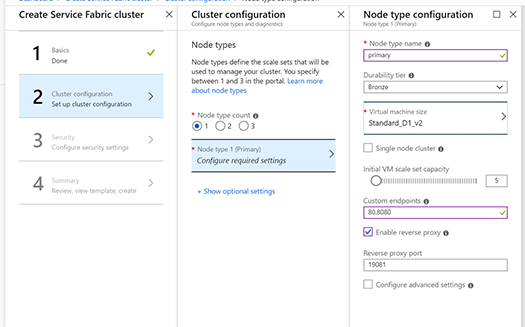
Create a Node type “1” to host our primary cluster of five virtual machines.
Custom endpoints are what will be exposed in your load balancer to be redirected to your application being hosted in the Fabric. Additional endpoints can be added later if needed.
Later in the tutorial, we will be deploying a Get Started application from Microsoft that requires the Reverse Proxy port to be enabled.
Virtual machine size in an important selection. Machines with at least 16GB of local disk space are necessary to run the default services of the Fabric. I selected “Standard_D1_v2” for this test cluster.
Here is more information on the virtual machine: https://docs.microsoft.com/en-us/azure/virtual-machines/windows/sizes-general#dv2-series
This page has more information about planning cluster capacity and which level of virtual machine to select: https://docs.microsoft.com/en-us/azure/service-fabric/service-fabric-cluster-capacity
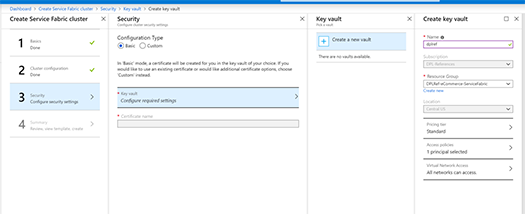
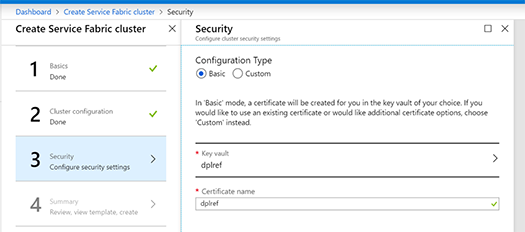
Step 3: Security
Select the Basic configuration type and create a new Key Vault to store the security certificate.
After deployment of the new Key Vault, you will see an error like this:

Click the “Edit access policies for …” button to enable access for your virtual machines.
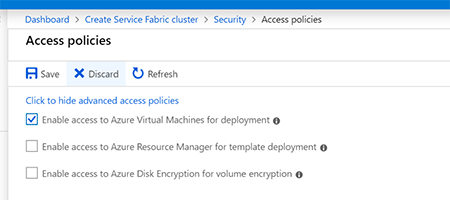
Enable the “Enable access to Azure Virtual Machines for deployment” checkbox and click Save. Then click the ‘x’ in the current blade to close it and return to add a name to the Certificate.
Step 4: Summary
After Running a final validation, the “Create” button will be ready to deploy your Service Fabric cluster.

Click “Create” to deploy the cluster.
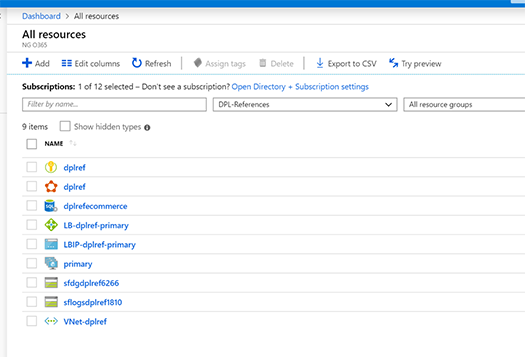
After successful deployment, these resources will be available in your resource group.
Connecting Securely to the Service Fabric Management Console
First, we will need to download our security certificate and get the thumbprint to add it to the cluster to allow us to connect to the management console.
Navigate to “All Resources” in the Azure Management Console and select the Key Vault. Then click the “Certificates” link.
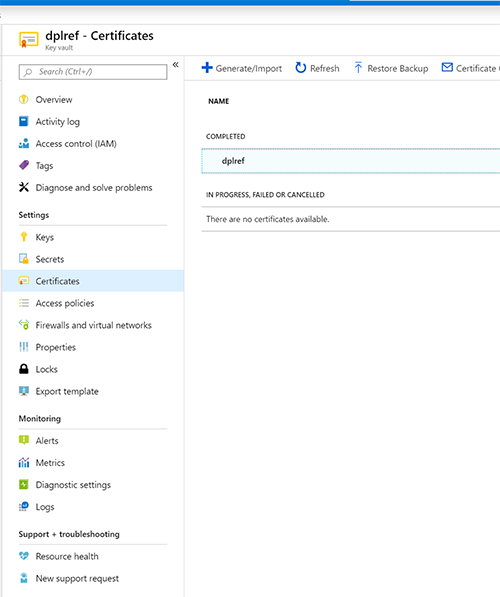
Click on the certificate twice to navigate to details.
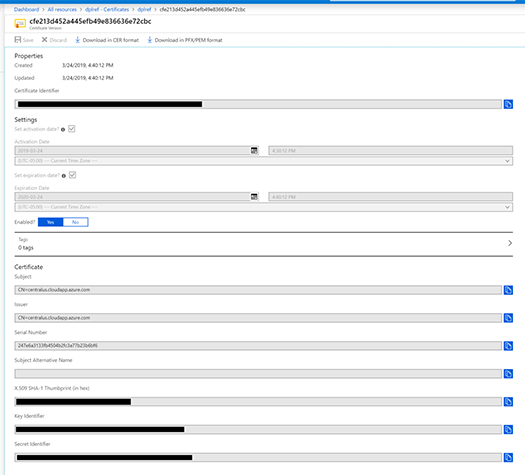
Copy the Thumbprint and the Secret Identifier and then click “Download in PFX/PEM format”.
Navigate to your Service Fabric Cluster in the Azure management portal and click on the “Security” blade.
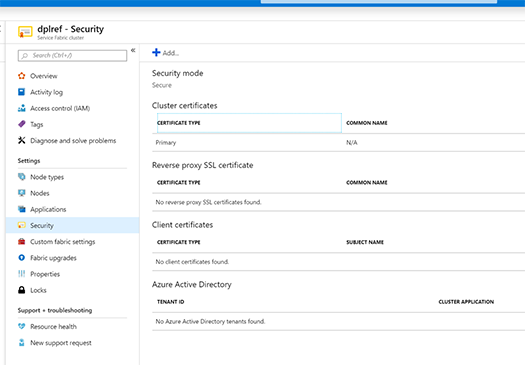
We are going to add the certificate that was created during setup as a Client Certificate. For production clusters, it is strongly recommended to have a separate certificate, but for the purposes of a demo cluster we will use the same certificate.
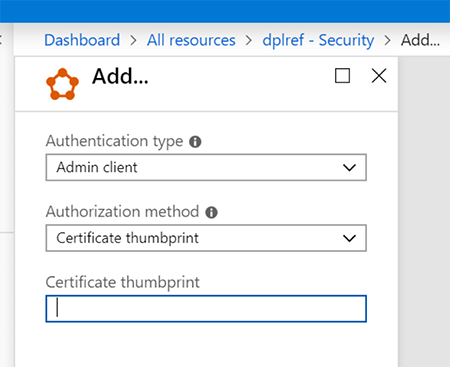
Click the “Add…” button and copy in the Certificate thumbprint we saved previously. It will take a little time to update the user configuration on the cluster to see the Client Certificate available.
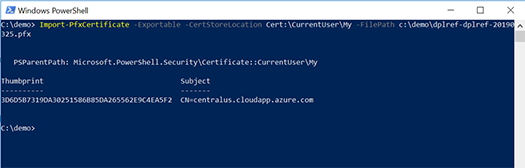
Install Client Certificate on the Local Machine
The PowerShell script from the link below will be used to install the certificate on our local development machine. We did not add a password to this certificate, so it’s not needed here. For a real deployment, make sure to password protect your certificate. Here’s some additional information on installing certificates: https://docs.microsoft.com/en-us/azure/service-fabric/service-fabric-connect-to-secure-cluster#connectsecureclustersetupclientcert
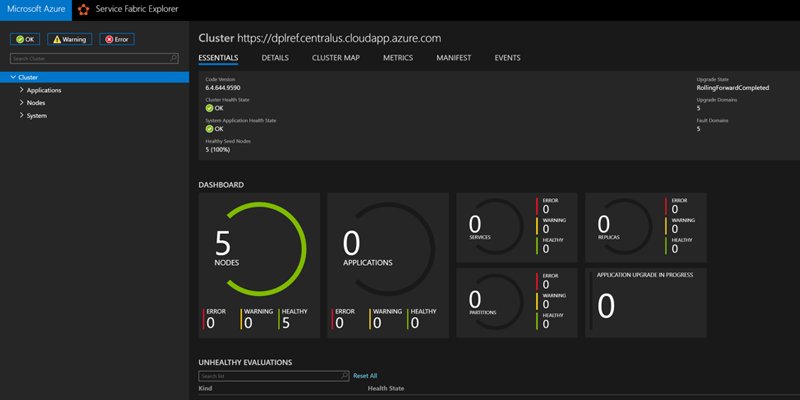
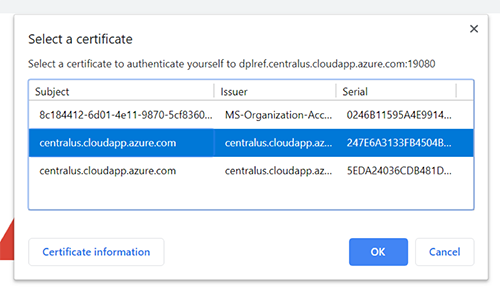
Head back to the Overview page for your Service Fabric Cluster in the Azure Portal and click the “Service Fabric Explorer” link and then select your newly installed certificate in the browser to securely connect to the cluster.
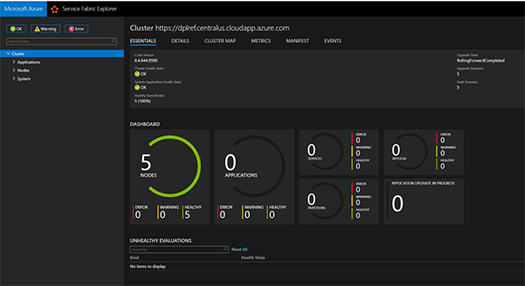
Check out the green dashboard of our new cluster.
Deploying an Application with DevOps to the Cluster
Microsoft provides a Service Fabric quick start application at https://github.com/unter/service-fabric-dotnet-quickstart if you want a first application to deploy to your cluster.
Instructions for deploying this application using Azure DevOps can be found here: https://docs.microsoft.com/en-us/azure/service-fabric/service-fabric-tutorial-deploy-app-with-cicd-vsts


