Product Design Lifecycle, Part 2: Scope + Structure
One of the toughest and most critical steps of the product design lifecycle is the Scope definition stage. It also happens to be where so many people go wrong—roughly 29% of the projects get it right and succeed according to the Standish Group’s Chaos Report.
Scoping isn’t something that you can spend a day doing and never think about again. Scoping a project starts during the planning phase, just after the strategy phase when we first begin to define the project and its goals. Scope defines the depth and breadth of the tasks or user stories that are required to fulfill the business needs / project goals / project requirements. Our primary method for defining the scope and scale of a project is Agile Story Mapping.
Defining the Scope
After completing the Strategy phase of the Product Design Lifecycle, where we got some early validation on our key hypothesis and assumptions, we’re now ready to create specific goals for ourselves so that we can use those goals and critical outcomes to measure what we should do – as well as what we should not do – and to what degree.
One of the most important things that we do during the planning phase of any solution is to define specific goals—first at the project level, then again at the user level. During the Strategy phase, we spent a great deal of time identifying the underserved needs of our target audience in relation to our business needs and goals. As part of this, we created a number of hypotheses and assumptions that we then validated in some way with a sampling of our target audience.
Now we’re ready to create specific project goals and critical outcomes that will help make strategic decisions based on KPI’s and other measurements that will direct our “what to build” scoping decisions.
How Will it Be Used?
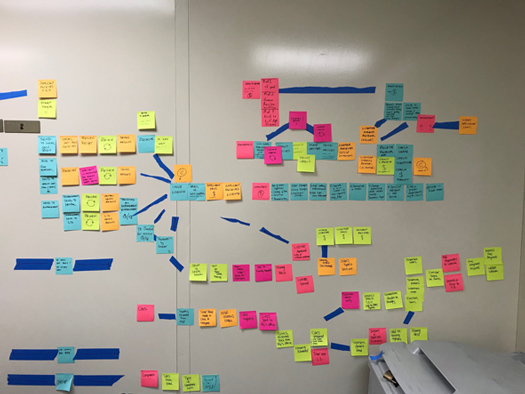
Sometimes projects stakeholders have a clear understanding of how and why the solution will need to work to support well-known workflows. When this isn’t known, we have a tool in our UXD toolbox that we use: the User Journey Map
There are two types of user journey maps that we make. The first is super light-weight. We use it to gain a shared understanding of simple workflows. And then we have other ways to capture and share workflows for those times when workflows are not as linear and involve multiple users across different timelines.

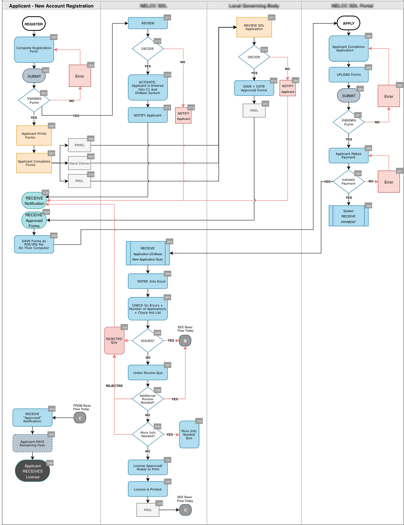
Use case scenarios are another vital tool that we use to ensure that we truly understand how our target audience needs and wants to interact with our solution. A scenario, in its simplest form, is a story; a contextual and situational narrative that captures how a user performs tasks using the solution we’re designing.
There are several types of scenarios that we can pull from our toolbox. Some of the ones we use most often are:
- Use Case – provides a complete understanding of the user and system interactions.
- Storyboard – primarily visual representations of the key interactions and can sometimes create stronger contextual understandings.
- Context – similar to short stories. They are narrative in nature and provide critical use incites from the perspective of the primary user.
What all of these different deliverables give us is the ability to extract the correct functional requirements needed by the target users to accomplish their goals. The added value of journey maps and scenarios are the key insights and empathies that the team can then account for and incorporate into the solution design.
How Big is It?
To accurately answer the “how big is it” question, we first need to understand which major deliverables will be used to identify the key features of the solution. We have many tools in our UXD toolbox that we can use to do this, but one of my go-tos is the User Story Map. Often, this tool provides the best overall understanding of the business needs, user goals, underlying user workflows, and end-point needs while providing the team with a sense for how big and complex the proposed solution is. This is huge!
The sooner the team can have a clear and shared understanding of who our target audience is, what they are trying to achieve, and the types of activities they must do in order to best do their job successfully has a direct correlation with the effectiveness of the solution.
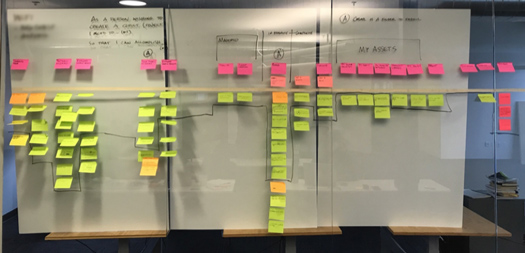
User story mapping is a great way to quickly identify the epic-level requirements along an interaction timeline — a timeline that is built around the tasks and workflows required by our users.
The story mapping process starts by listing the key capabilities and features that will make up the product at the top of the map along a workflow timeline (backbone). Below the workflow timeline and beneath each feature is a prioritized list of user stories. The magic of the story map happens when the project team collaboratively slices and dices the story map – beginning horizontally – and defining the critical set of features and stories or MVP (Minimum Viable Project). Once the team has done that, the next step is to agree on a plan to iteratively divide the stories above the MVP line into sprints. Story planning can happen at more than one time.
Initially, it happens as part of the initial scoping exercise before any development is done. After completing the first sprint, the story map can be updated as part of release planning or throughout the project as needed.
Defining the Structure
At Don’t Panic Labs, not only do we need to be able to quickly and accurately identify how big and how intricate a solution is but we also have to have a clear understanding of all the different piece-parts that it’s comprised of. Identifying those key aspects, elements, and controls is the key deliverable of the Structure phase of our design lifecycle.
Where We Start
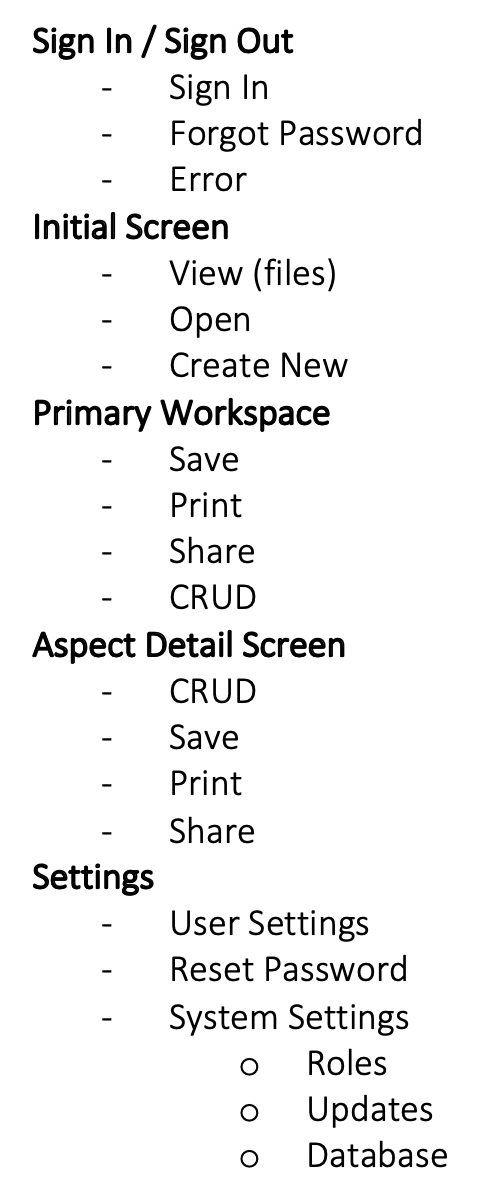
Once we’ve created a sense for “how big and involved is it” (through user story mapping), we need to quickly extend our understanding—to craft the hierarchy of the end product and its parts so that we can begin to identify the different types of views needed in order to support the epic-level requirements. To do this, we create a Solution Architecture Outline.
The solution architecture outline is just that, a hierarchical representation of the epic-level screens and features needed to meet the needs documented in the user stories. The value of this document is really felt on large, complex projects. But I’ve even found it helpful on smaller projects that may only have three to four critical views or Screen Types.
Creating High-level Understanding
To create accurate estimates for proposals, we still need a little more detail. Although the site architecture document takes us another step closer to a deeper understanding, it still lacks the detail that only comes from knowing things like which types and placements of elements and controls as well as key screen flows and dependencies.
To meet this final need of “just enough” understanding, we reach into our UX Toolbox for our site map and screen/page type diagram.
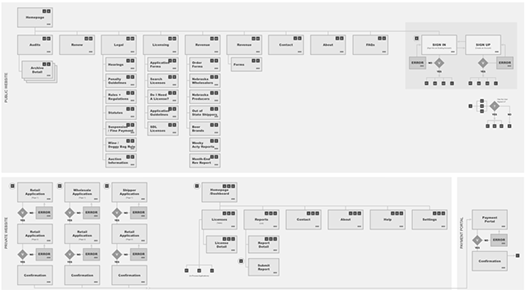
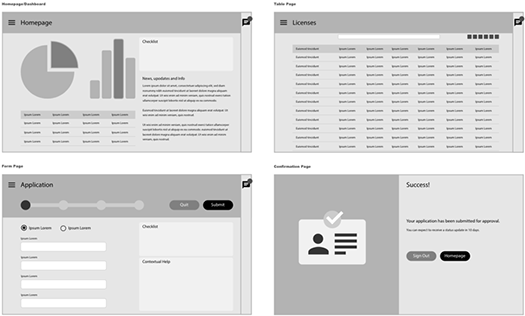
The Site Map document combined with the Screen Types document is a proven go-to for us and provides just enough understanding to accurately estimate the critical aspects, elements, controls and key deliverables of a solution.
Why Scope and Structure Matters
Capturing the solution requirements is a valuable and necessary stage in the design process. Getting it wrong from the get-go will have a devastating impact on the final outcome. By working with your key stakeholders and team members through a series of phases and activities, you can reduce risk and create repeatable success. Stakeholder Interviews, Journey Mapping, Use Case Scenarios, User Story Mapping, Creating Site Architecture, and Screen Type documents are some of the key deliverables that help us to create accurate estimates while enabling us to design more effective user interactions faster.


