A Website Without Servers – Using Azure Functions: Part 4, Angular Site
In part 1, we set up some basic infrastructure for our engineer fashion app. In part 2 and part 3 we configured some source control so we can work like sane people. Now we are going to stand up a very basic Angular site.
Angular, do you mean Angular 1 or Angular 2? Well I mean Angular, not AngularJS.
What?
Yep, it gets confusing.
The Angular team changed how they were differentiating Angular 1 from Angular 2 not too long ago. Actually, Angular 2 is now old; they are actually on version 4. But, Angular is being used to denote version 2+, and AngularJS is being used to denote the older version 1.
Now if you have seen the difference between 1 and 2 from a code perspective, you would know that they differ a lot. Viewing them as different frameworks isn’t crazy. Here is some more information.
In this post, we will create an Angular site that will provide enough functionality to demo Azure Functions. While this post isn’t about Angular, I am going to walk through building this site in Angular.
The current hot idea in open source land is CLIs. Everyone is building a CLI to make their application development easier. It is basically the repurposing of a Rails concept that has been there almost since the beginning (I don’t actually know when, but at least since version 2 days circa 2008).
But with Angular, we now have a CLI. The Angular CLI makes it easy to quickly stand up new sites and components. I am not going to cover installing Angular, but if you want help with that I recommend their quickstart guide.
To create a new app, execute:
ng new YOUR_APP_NAME_HERE
Now you have an Angular application. Yep, it’s that easy. Reminds me a lot of the way Rails creates applications:
rails new YOUR_APP_NAME_HERE
Now we can jump into our application and run it:
cd YOUR_APP_NAME_HERE
ng serve
Back with Rails you can achieve the similar results:
bin/rails server
Now that we have an Angular site, what do we do? Just navigate to http://localhost:4200/ and you should see a default Angular welcome message.
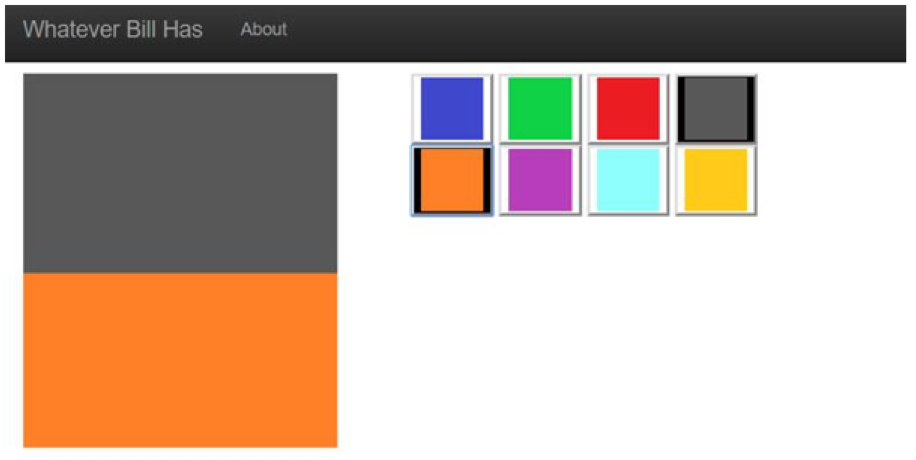
We are going to create a very basic Fashion application instead of the standard todo application people normally build. This is a simple, single-page application.
Next, we will create a few components and a basic router. To create the components, we will use Angular’s CLI:
ng g component Home
ng g component About
The nice thing about Angular is creating these components can be done for you with a simple Angular CLI command.
After we create our components, we need to set up some routing. We need to change our app.component.html file to contain a router outlet:
We will wire up our router module, which will support two routes:
http://localhost:4200/#/
http://localhost:4200/#/about
To wire up the module, we need a simple routing configuration. This is pretty easy with Angular. First, we will create an array that defines two routes: an “about” route and a default “**” route.
Next, we will configure the module configurations for the routes. One thing to note is we are using hash navigation in this project.
Now that we have the routing configured, we just need to write the modules.
The “about” module is a drop-dead simple HTML page.
The home module is a bit more complex since it does some data binding back to the TypeScript component.
First, we bind the border to highlight the selected shirts and pants:
[style.background-color]=”shirt == 0 ? ‘black’: ‘white’”
The other piece of binding is the click handler. With Angular, creating click handlers is super simple. We just add the “(click)” attribute to our button and implement the button click handler in our TypeScript:
(click)=”selectShirt(0)”
Now implement in TypeScript:
Add in a little more HTML and TypeScript, and we have our simple site.