
Using Git From PowerShell with Multiple Hosts
I do almost all of my Git work via the command line and so should you. As a tool that developers use every day, it is important that we understand what is happening. I find that most Git GUIs hide too much and developers that rely on them exclusively are often unaware of how Git actually works and the multitude of features that Git offers. This, in turn, leads to developers missing opportunities to use Git functionality that may be helpful but isn’t exposed through their GUI.
I also have different sets of credentials for different Git hosts, some for personal accounts and some for work. However, getting everything set up to execute Git commands in PowerShell across multiple Git accounts takes a bit of effort.
This guide should walk you through setting everything up to use Git from PowerShell in a way that should provide an easy-to-use experience. For completeness of this guide, I assume you have nothing set up for Git.
Prerequisites
This guide was written using Windows 10 and PowerShell v5.1. The steps should be very similar for other versions but you may have to do some adjusting.
Installations
Git
First you have to install Git, https://git-scm.com/. I used version 2.14.1 for this post. I just took the defaults for all options in the install wizard.
posh-git
The instructions for setting up posh-get at https://github.com/dahlbyk/posh-git are excellent. You shouldn’t have any problems if you follow the installation section.
Setup
With installations out of the way, we now will configure posh-git so that we always have it available when we are in PowerShell.
Setup SSH Security
1. Open Git Bash. You can find this in the Start menu.
2. Make sure that ~/.ssh directory exists. If not, you can run mkdir .ssh to create it.
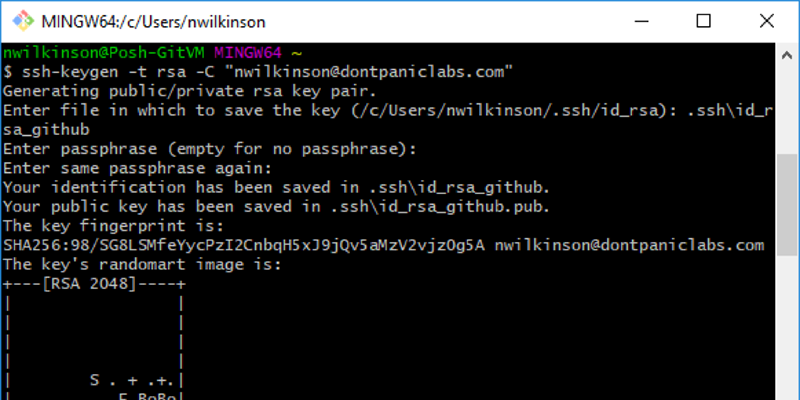
3. Run ssh-keygen -t rsa -C “user@email.com”. Replace with your email address for the Git host.
4. Name the file from the prompt. Use a file like “.ssh\id_rsa_” (e.g., “.ssh\id_rsa_github”). We want all of our files in the same directory so we can find all of them in a later step through a PowerShell script.
5. Set a strong passphrase. Do not use an empty or weak passphrase, especially if dealing with other people’s code. If your machine were to be compromised, this passphrase may be the only thing between security and disaster.
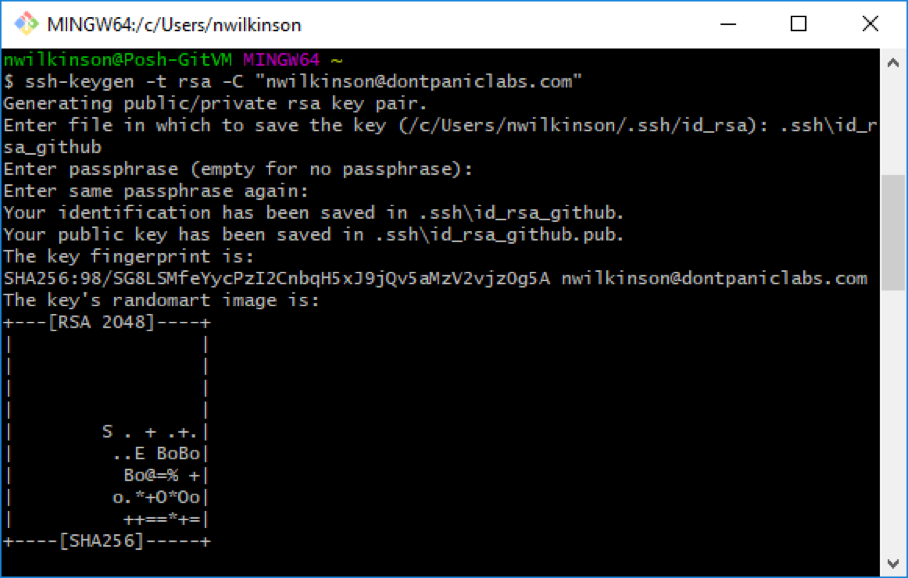
6. The SSH files for this repository have now been created. Your Git bash should look similar to this:
7. Setup SSH config. Open or create a file “~/.ssh/config”. Add a new entry for the host like
8. Set up SSH for the Git host. The steps for this will vary based on who the host is. Here are instructions for some specific hosts:
- GitHub – https://help.github.com/articles/adding-a-new-ssh-key-to-your-github-account/
- Visual Studio Online – https://www.visualstudio.com/en-us/docs/git/use-ssh-keys-to-authenticate
- Bitbucket – https://confluence.atlassian.com/bitbucketserver/ssh-user-keys-for-personal-use-776639793.html#SSHuserkeysforpersonaluse-useSSH
You can easily copy the necessary SSH keys for the host into your clipboard by using the command clip < ~/.ssh/id_rsa_.pub
9. Repeat steps 2-8 for each host or credentials. Each additional Git host or user that you have should have its own set of SSH keys protected with its own unique strong passphrase.
That way a compromise of one set of credentials does not spiral into all of your credentials. I use a password manager to help with generating and storing these different passphrases.
Set up User Profile
Now we will setup PowerShell to always import the posh-git module, start the ssh-agent, and prompt us if we want to use the various SSH keys we setup earlier.
1. Open PowerShell.
2. Run notepad $profile.CurrentUserAllHosts. This will either create or update the PowerShell profile for your user.
3. Add code to the PowerShell profile.
Test It Out
After restarting PowerShell, you are now ready to start using Git. You should now see prompts for each SSH key you setup earlier.

You can select “y” and then enter the passphrase for that file. If you are not going to be using the other hosts, you can just select “n” and it will be skipped.
If you were to restart PowerShell, keys that are already present in the ssh-agent will not be prompted for again.
As you connect to a Git host, you may be prompted that the authenticity of a host cannot be established. If that happens, you can verify the fingerprint from the server and then type “yes” to continue connecting. This shouldn’t happen more than once per IP for the host.
You can now clone a repository to your local machine. Or, if you already have a Git repository on your local machine, you can just navigate to it and start using Git commands from PowerShell.

Further Reading
I need to give credit where credit is due. Most of this guide was inspired by the work on these sites:
- http://haacked.com/archive/2011/12/19/get-git-for-windows.aspx/
- https://help.github.com/articles/generating-a-new-ssh-key-and-adding-it-to-the-ssh-agent/
I just combined their works together into one location with a splash of my own thoughts.
There are a multitude of options that you could use for much of this configuration. I’ve merely presented the barebones in this post. Here are few other links that may be of interest to you if you wish to dig deeper.
- Git Commands – https://git-scm.com/docs
- SSH Config File – https://www.freebsd.org/cgi/man.cgi?query=ssh_config&sektion=5&apropos=0&manpath=FreeBSD%2010.3-RELEASE
- SSH KeyGen Options – https://www.ssh.com/ssh/keygen/


