
Browser Debugging Between OS X and Visual Studio in Parallels
Over the last seven months I’ve been developing web applications using Visual Studio in Parallels 10, and the experience is alternatingly fantastic and frustrating, depending on the day. Some days I get the performance I want out of Parallels, and other days it’s incredibly sluggish and quirky, especially when debugging in a browser.
After several attempts to boost performance using various configurations of Parallels, I decided to try and shift all of the front-end browser debugging back to the Mac side. After digging through various articles and blog posts I was able to accomplish this, but it took some doing. So, it is my hope to provide a comprehensive list of the steps I’ve compiled together.
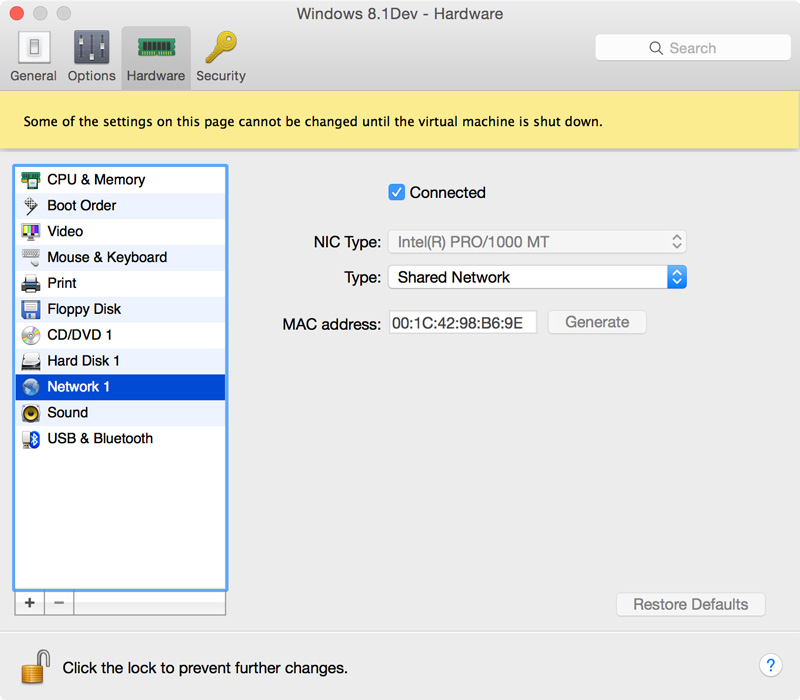
1. Enable shared networking in Parallels
Open up your Parallels configuration, click the Hardware tab, and select your Network. Set the Type to “Shared Network”. This allows OS X to see your Windows virtual machine.
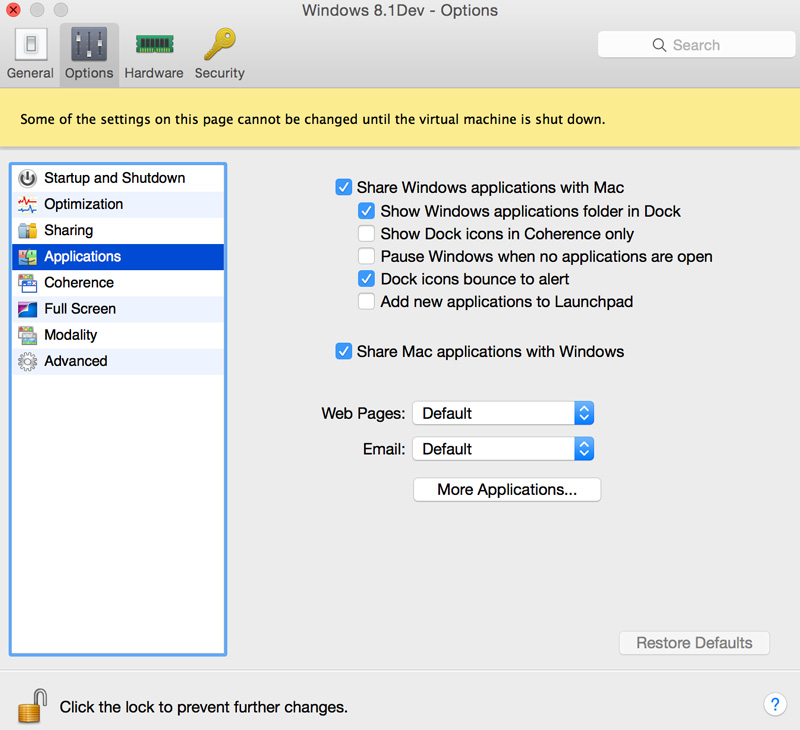
2. Enable shared Mac applications with Windows
While still in the Parallels configuration, click the Options tab, and click Applications. Ensure “Share Mac applications with Windows” is selected.
3. Enable Mac browser to connect to the virtual machine’s IIS web server
Next we need to append the virtual machine’s IPv4 address to the Mac’s /etc/hosts file with the name of virtual machine.
To find your IPv4 address in Windows:
- Open PowerShell.
- Type “ipconfig” and copy your IPv4 address that is returned.
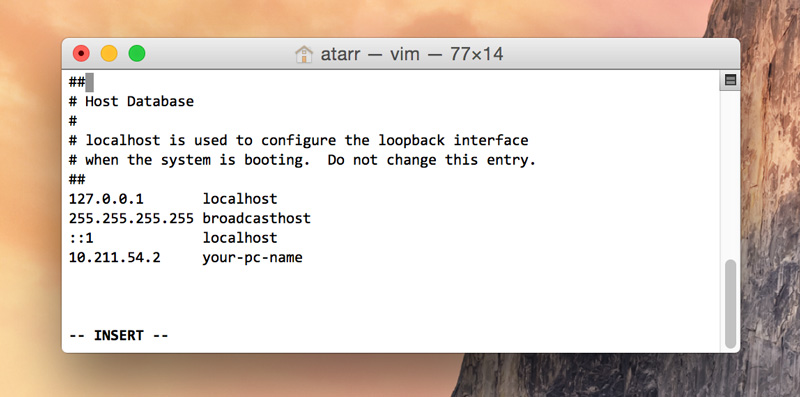
Append a line in your Mac’s /etc/hosts file with the IPv4 address and computer name. Steps to do this are outlined in step 2 here by Parallels – don’t worry about turning off the Windows Firewall, we’ll take care of that shortly.
When finished, your /etc/hosts should look something like this:
Update your IIS Express configuration
Since the Mac will be looking for your computer name, and not localhost, you’ll also need to update your IIS Express config file (located at Documents/IISExpress/config/applicationhost.config) so the project uses the computer name instead of localhost. Here’s an example of what your site’s section should look like after that change:

Now that you’ve configured IIS to use an external hostname rather than localhost, you’ll have to enable external access. To do this, open PowerShell as an administrator and run the following command:
netsh http add urlacl url=http://your-pc-name:1243/ user=everyone
4. Open up the inbound and outbound ports for the web app
Next, we need to configure the Windows Firewall to open up inbound/outbound ports so you can access your site. In my example shown above, my application uses port “1243”.
- Open Windows Firewall. Click “Advanced Settings” on the left.
- The “Window Firewall” with “Advanced Security” window is displayed. Right-click Inbound Rules and click New Rule.
- The New Inbound Rule Wizard is displayed. Select “Port” and click Next.
- Ensure “TCP” is selected. Enter the appropriate local port number (e.g., 1243). Click Next through the rest of the wizard with the defaults selected.
- On the final step, give the new rule a memorable name like “My Super Awesome Web App – 1243”, and click Finish.
Go through the same process for a new outbound rule (Note: You’ll need to select “Allow Connection” in the Action tab in the New Outbound Rule Wizard).
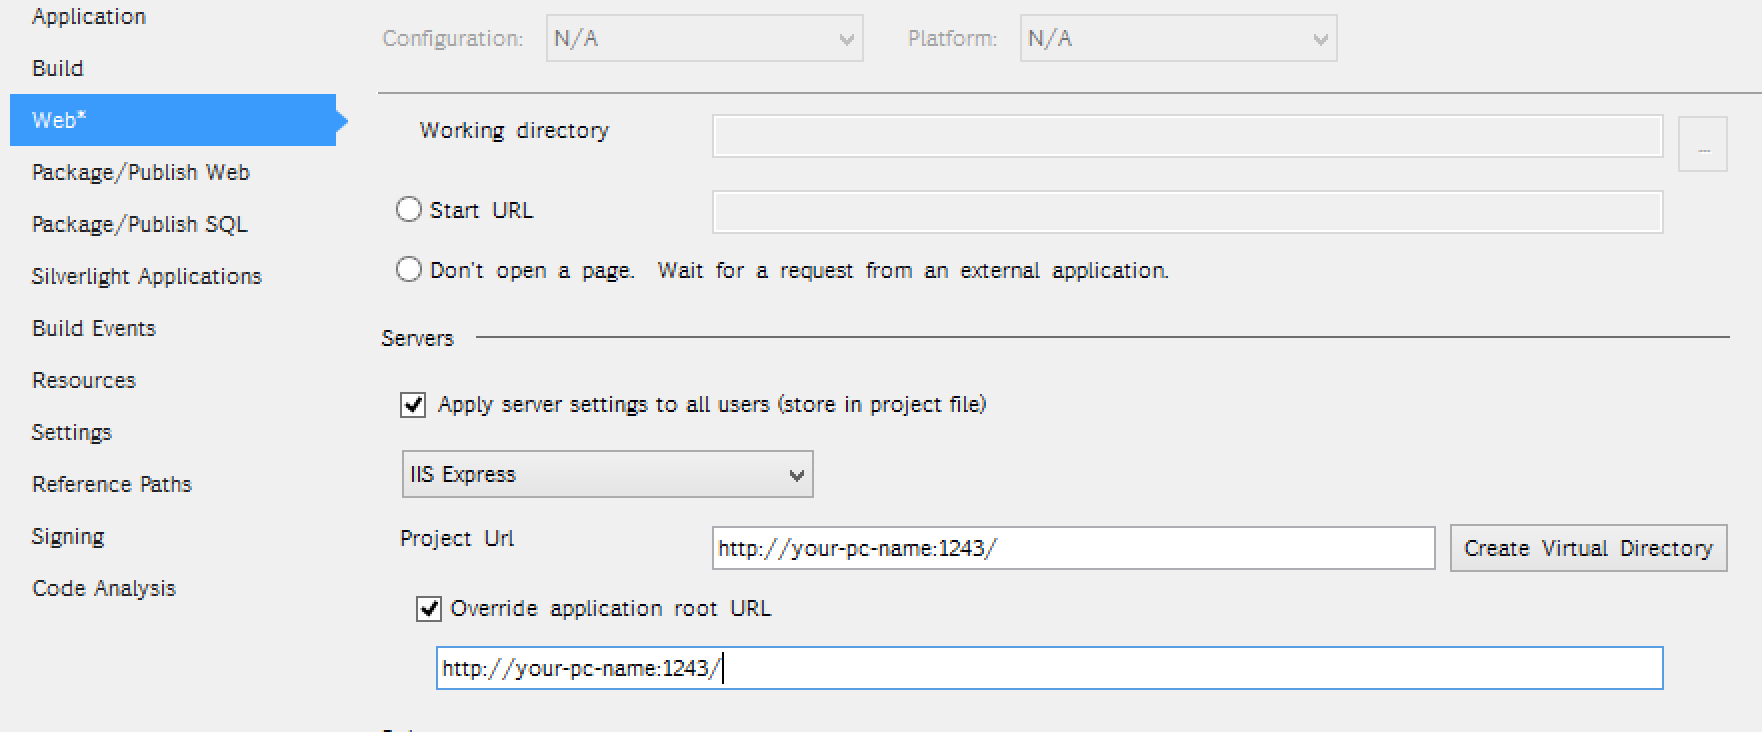
5. Update Visual Studio
We now need to update Visual Studio to make use of all the work we did above. Go into the Properties page of your web app, and change the Project URL to match your computer name instead of localhost.
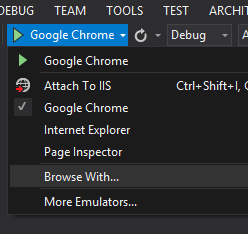
Finally, we need to add the Parallels browser as an option in Visual Studio (if it’s not already present).
Click the down arrow next to your currently selected browser and click “Browse with…”.
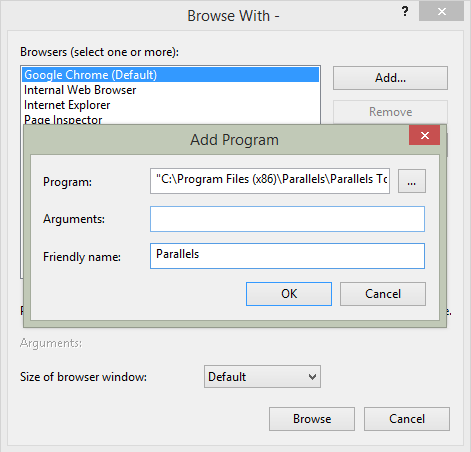
The Browse With box is displayed. Click the Add… button. For Program, specify the Parallels Shared Internet App located here, specify a Friendly name, and click OK: C:\Program Files (x86)\Parallels\Parallels Tools\SIA.
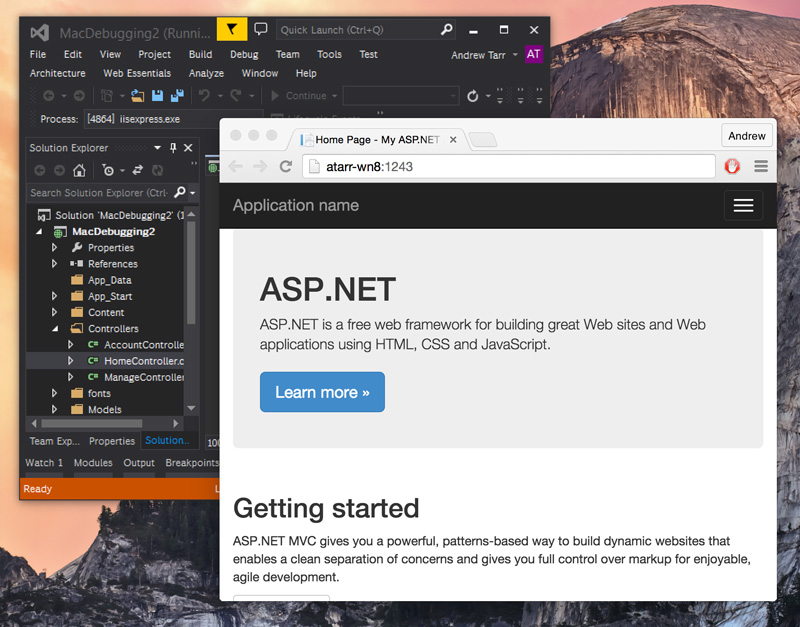
After the new browser is added, click the Debug button and voila.
Conclusion
With most of the setup taken care of on the first run through, setting up subsequent projects only takes a couple minutes. For me, this makes web development in Parallels a much more pleasant experience.
For those curious, here is my setup:
Hardware
MacBook Pro Retina, 2.5 GHz i7, 16 GB 1600 MHz DDR3
Software
• OS X Yosemite 10.10.4
• Parallels 10.2.2
• Windows 8.1 Enterprise
• Visual Studio Ultimate 2013
Updated – 3/28/2016
If you’re setting this up for use with Visual Studio 2015, you need to use a different applicationhost.config file. Since VS 2015 creates a local file for each solution, you need to search for it in the following path: <solutionfolder>\.vs\config\.
Thanks to reader Santhos and Mike Dice’s blog post for pointing out how to do this.


