
Securing the Docker API on Windows
As it is with most things Docker, the majority of the tutorials and instructions on securing the Docker API endpoints use Linux-based examples. Being new to both the Docker and the Linux world made this process a little more frustrating than I expected. However, I made my way through it and documented my journey which led to this step-by-step guide to securing the Docker API in a Windows environment.
Start by downloading and installing the full openssl binaries from https://slproweb.com/products/Win32OpenSSL.html.
For this example, I’m going to create both server and client certs on the same machine and then move the files around rather than installing openssl on both the docker server and client machine.
Create the Server Side CA Private and Public Keys
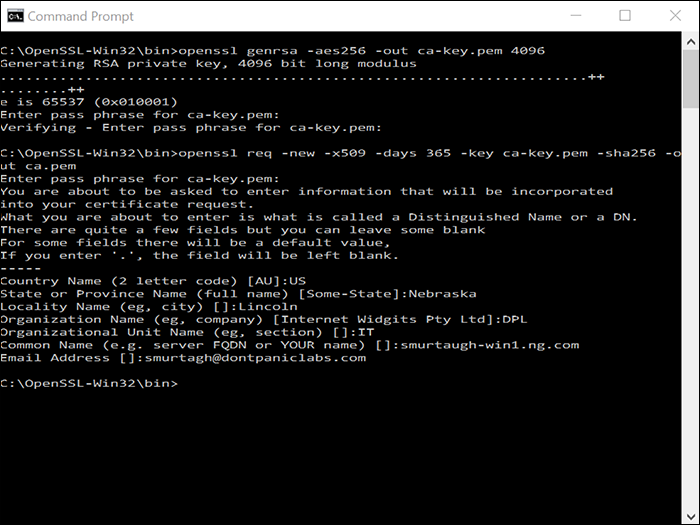
Open the command prompt and navigate to the openssl install directory (c:\openssl-win32\bin by default)
Enter and confirm a passphrase for the certificate authority (CA) key.
Enter a CA key passphrase.
Enter cert info, making sure the Common Name matches the FQDN of the Docker host.
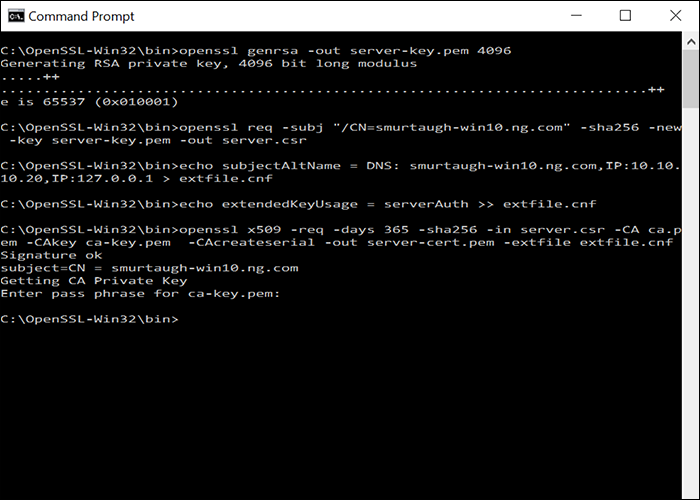
Now that we have a CA, you can create a server key and certificate signing request.
We’ll set the key’s extended usage attributes to be used only for server authentication, as well as specifying the DNS name and IP addresses for the certificate.
You will be prompted for the CA key passphrase.
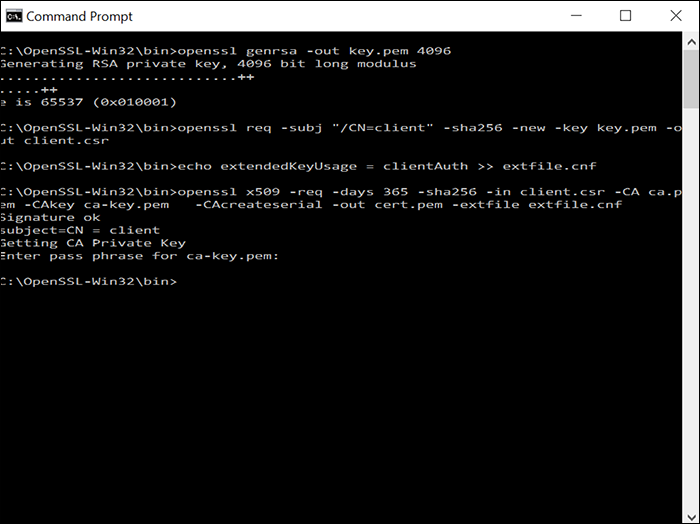
Now let’s create the client-side certificate signed by the CA, and set for client authentication.
You will be prompted for the CA passphrase once again.
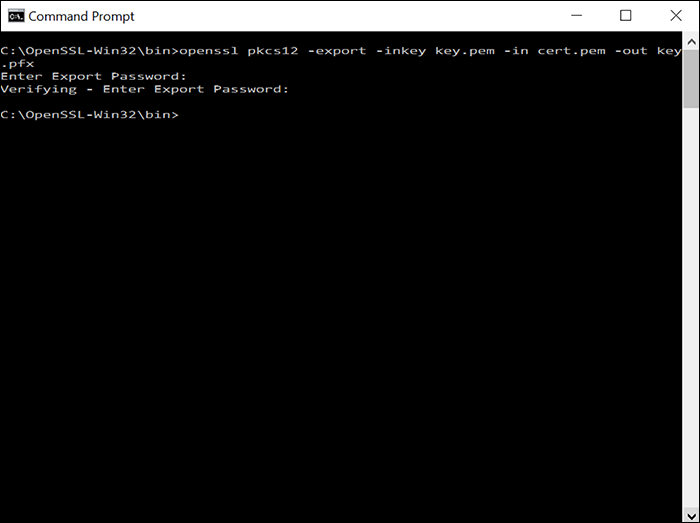
Finally, you may need to turn your client certificate into a .pfx file depending on what you are using to connect to the Docker API. If you need a .pfx file, you can create one with the following command:
Note: You will be prompted for a password. This does not have to be the same password as the CA passphrase.
Now that we have all the cert files created, let’s move them to the right places and configure services accordingly.
On the Docker server, copy the ca.pem, server-cert.pem, and server-key.pem to c:\programdata\docker\certs.d\ . Note that you may have to create the directory.
Configure Docker Enterprise Edition
Create or edit the daemon configuration file (C:\programdata\docker\config\daemon.json) with the following settings:
On Docker Community Edition (CE), you can set the configuration values on the Daemon tab of the Settings modal.
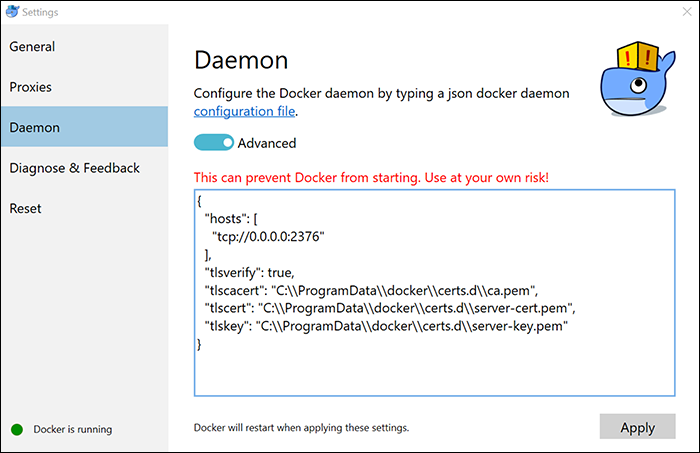
After configuring the TLS settings, restart the Docker service.
Note that you may also have to open port 2376 on the Windows Firewall and/or Azure network security group (NSG) if using an Azure VM running Windows Server 2016 with Containers.
Finally, let’s see if we got all this working properly. I’m going to use Docker.DotNet in a simple console app to create a container and start it.
Since this is a self-signed CA, the connection will most likely fail because the CA is not trusted out of the box. You can either programmatically ignore the certificate error as shown in the code below or add the ca.pem file to your Trusted Root CAs store on Windows via MMC.


