Automated UI Testing Using TestStack.White and Continuous Integration with TeamCity
One of the things that our development approach at DPL allows us to do is to have a very low ratio of QA testers per software engineer. Our architecture designs and patterns provide for very isolatable and testable components, allowing us to reach high coverage numbers in most areas of our code. However, one area we’ve historically fallen short is UI testing.
One way we’re trying to improve this is through the automation of UI testing by using TestStack.White to test our WPF applications.
Below I have documented the challenges of integrating the TestStack.White UI tests into our continuous integration using TeamCity.
Getting Started with TestStack.White
I’m not going to spend a lot of time discussing how to set it up since it’s fairly well documented.
The “DOM” model used by TestStack.White is fairly simple. You have an Application which is the process of your .exe, Windows inside each Application, and Controls which make up each Window.
A selector is used to find each Control, and basic operations can be performed on each. SearchCriteria can be constructed to find an element by ControlType, Text, AutomationId (Name), etc.
The operations available depend on the type of Control. Click on a Button, set text value of a Textbox, select items in a ComboBox, etc. A generic IUIItem is available to interact with custom controls.
Our approach has been to create a static class with a collection of selectors for all of our UI items that can be accessed by any UI test.
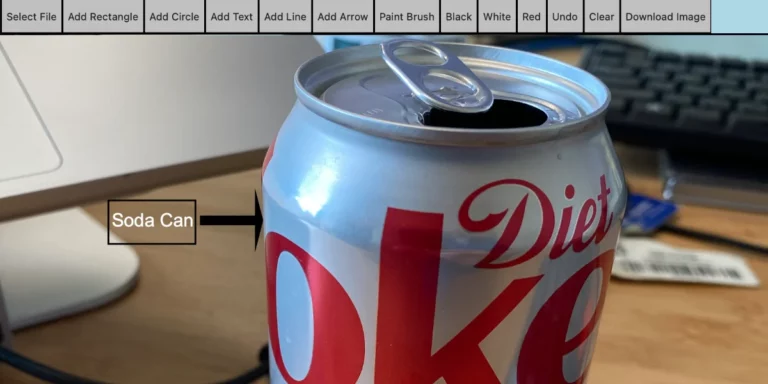
Here’s a small sample application that demonstrates our approach to structuring UI tests. The application contains a simple list to which we will be able to add, remove, and edit items.
Note that simply running your test will fire up the application and allow you to see the tests being executed.
https://github.com/smurtagh/Sandbox/tree/master/WPFGrid
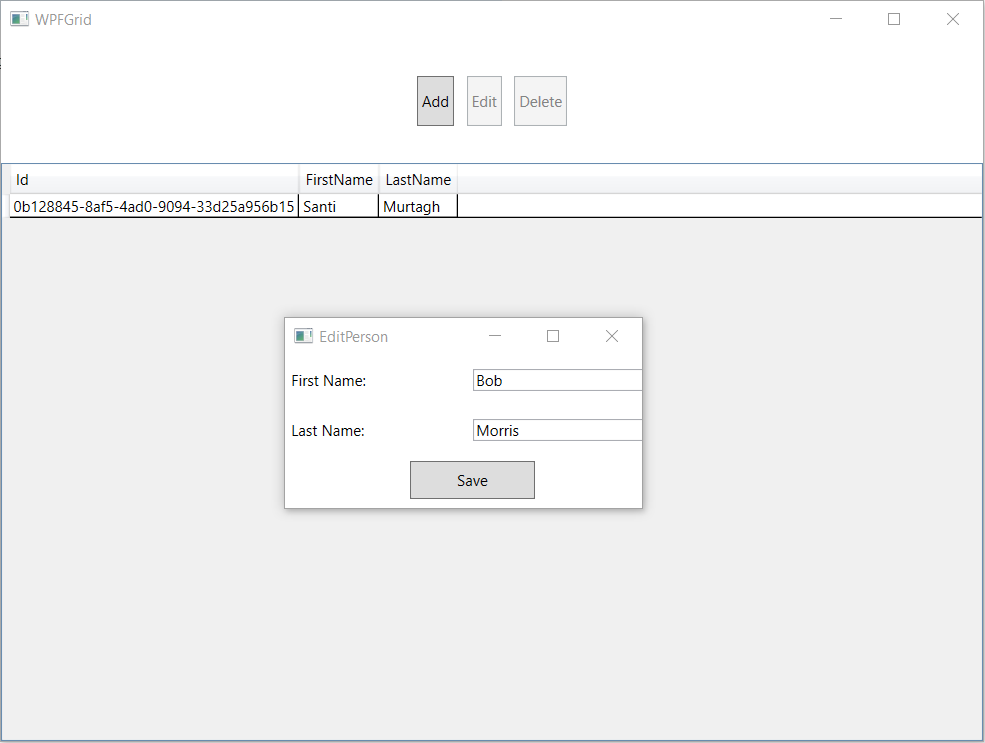
These sample tests allow us to test the basic functionality of the application, as well as ensuring UI behaviors such as the Button states toggle based on their availability.
This specific sample shows how you can test the edit functionality:
[TestMethod]
public void UI_EditUser()
{
Application application = ItemSelectors.GetWPFGridApp();
//Find the main window
Window mainWindow = ItemSelectors.MainWindow(application);
//Select Item to edit
ListView mainGrid = mainWindow.Get(ItemSelectors.MainGrid);
//Select the first row
mainGrid.Rows[0].Cells[0].Click();
//click edit button
mainWindow.Get
Here are a few sample selectors from our library that can be used across multiple tests.
#region Buttons
        public static SearchCriteria AddButtonFinder =
        SearchCriteria.ByControlType(ControlType.Button).AndAutomationId("AddButton");
        public static SearchCriteria EditButtonFinder =
        SearchCriteria.ByControlType(ControlType.Button).AndAutomationId("EditButton");
        public static SearchCriteria DeleteButtonFinder =
        SearchCriteria.ByControlType(ControlType.Button).AndAutomationId("DeleteButton");
#endregion
Setting up Continuous Integration with TeamCity
The main challenge with integrating TestStack.White tests into TeamCity is that the tests need an interactive Windows session in order to run tests against the application. By default, TeamCity build agents run as a Windows Service, but with a few tweaks it can run as a Console Application. Here are the “tricks” to run the UI build on this Agent.
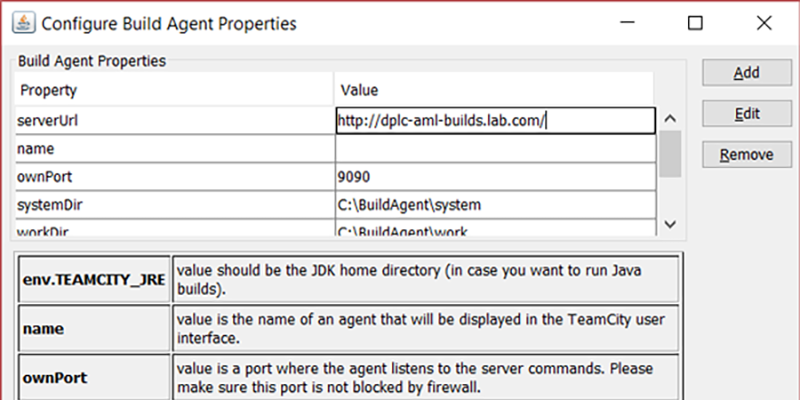
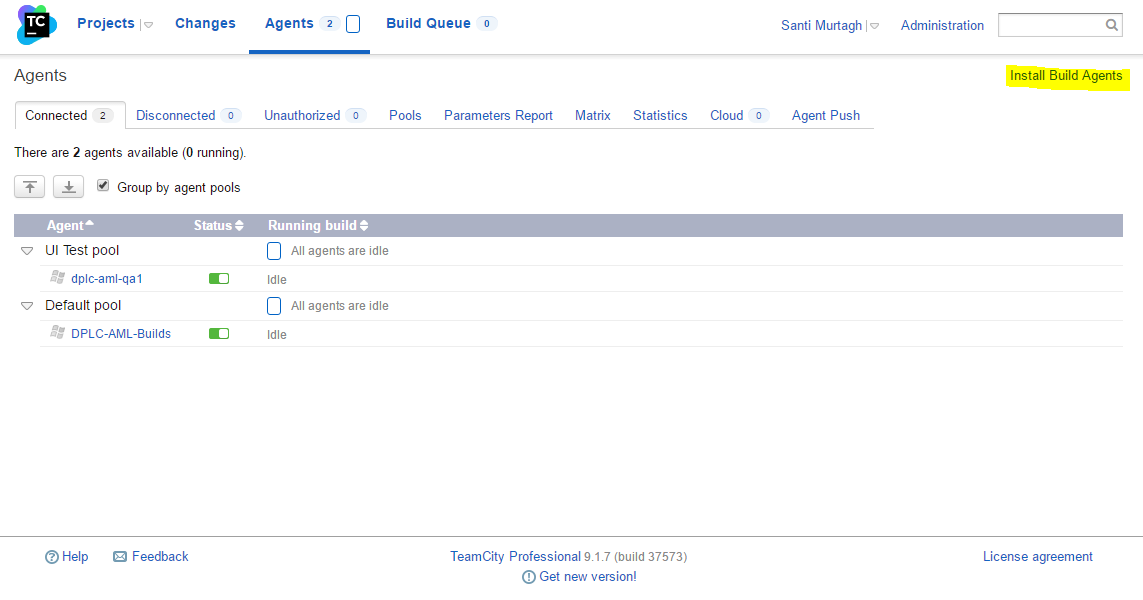
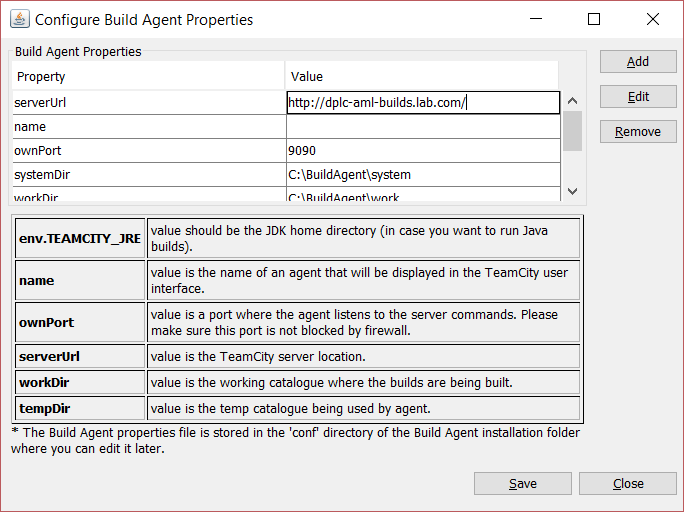
- Install a new TeamCity Agent on a new server that will be your UI test Agent. From your new server, browse to the Agents tab of your TeamCity Console and click “Install Build Agents”. Using the MSI installer, make sure to set the right serverUrl for your build server during setup:
- Create a user (I personally created a local user) on the build Agent server that will remain logged on.
- Make sure the user has no screensaver, session lockout/timeout, etc.
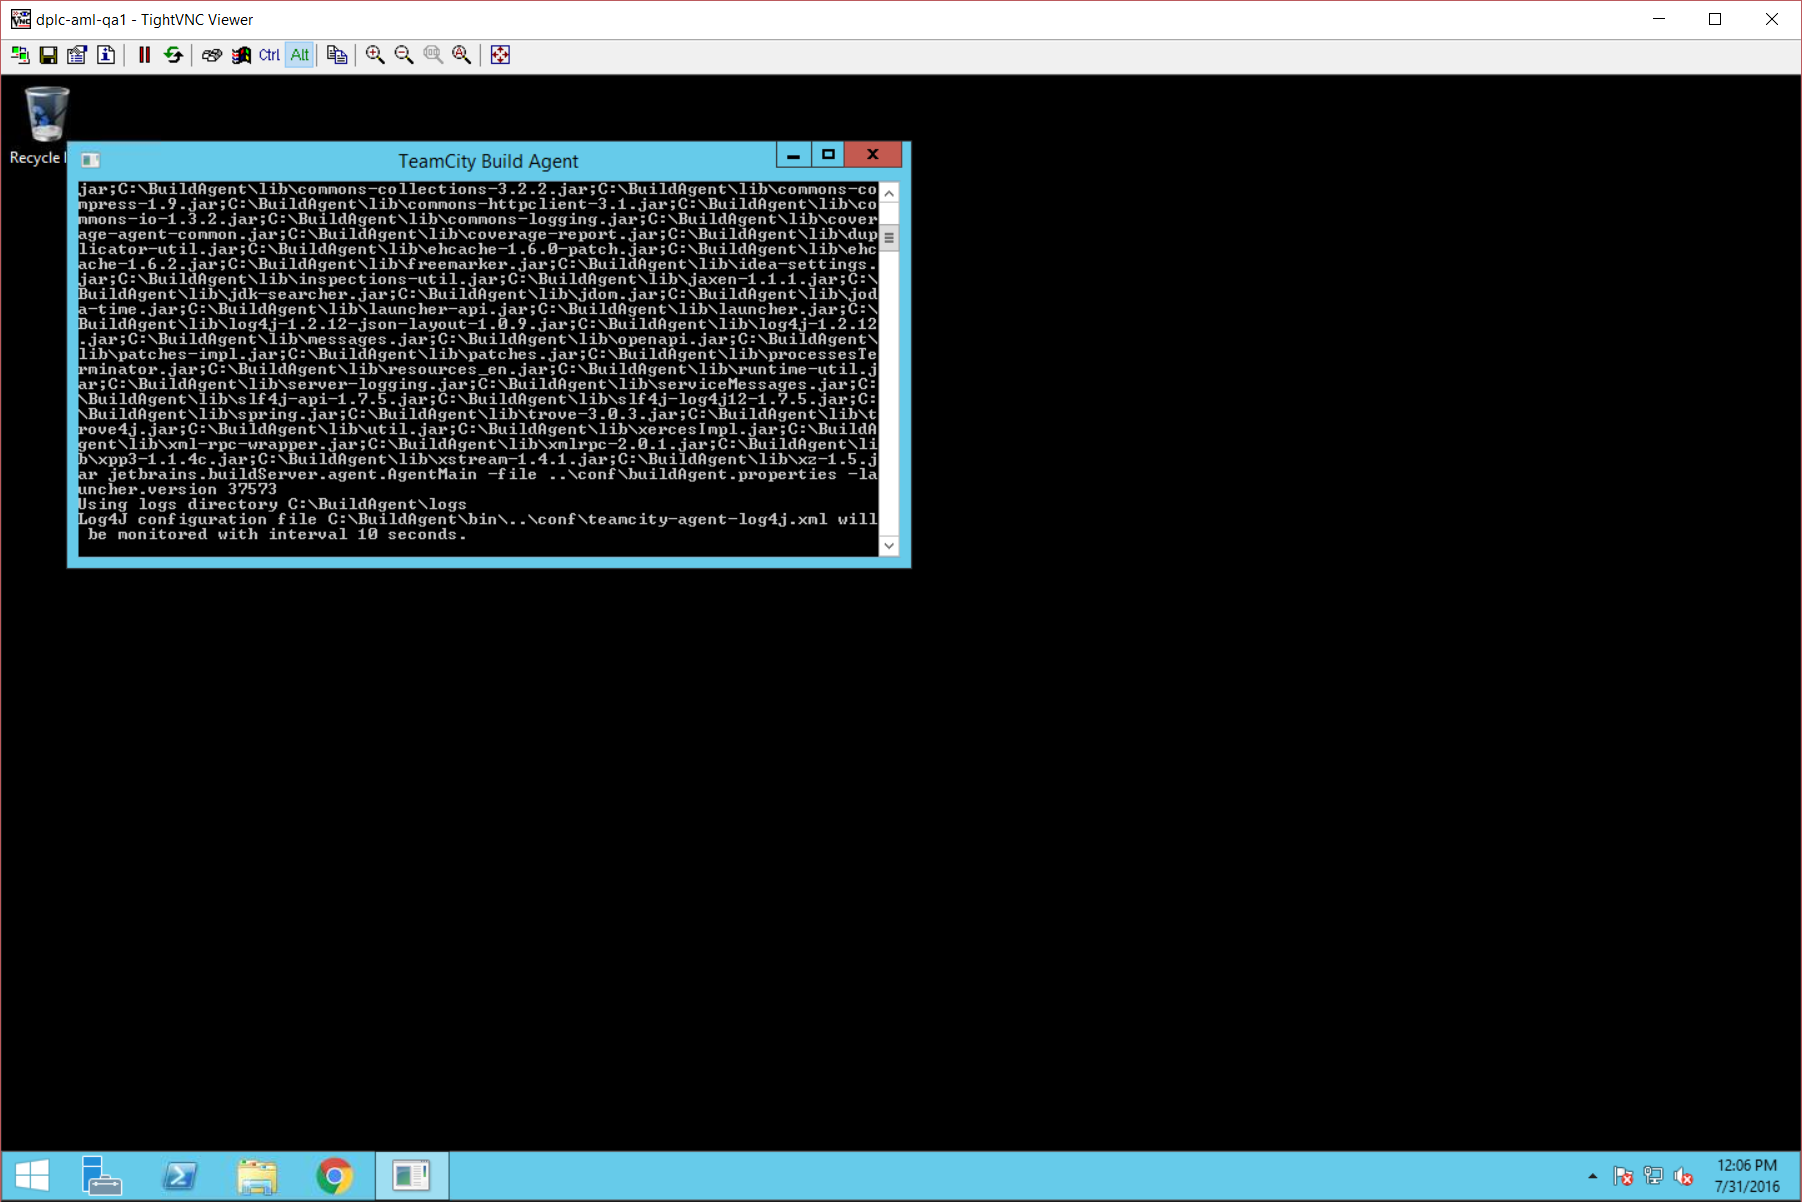
- Install a VNC viewer such as TightVNC and connect to the server using a VNC client instead of Remote Desktop. This will ensure your session remains active even after you disconnect.
- Set up Autologon for your user to make sure the user logs in right away after a reboot.
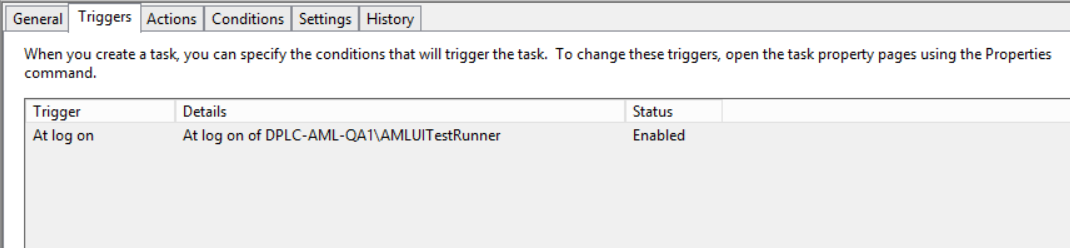
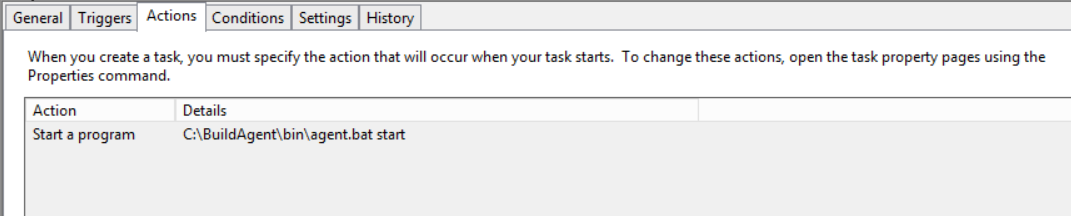
- The TeamCity build Agent will have to run in interactive mode. Create a task in Task Scheduler to run at logon for your user and execute [buildagentpath]\bin\agent.bat start.


You may also have to disable the Windows Service for the normal build Agent installed by the TeamCity Agent installer. - Reboot your Agent server. Your VNC session will end. When you reconnect after the reboot is complete, you should see the session for your user already started and the build agent launched.

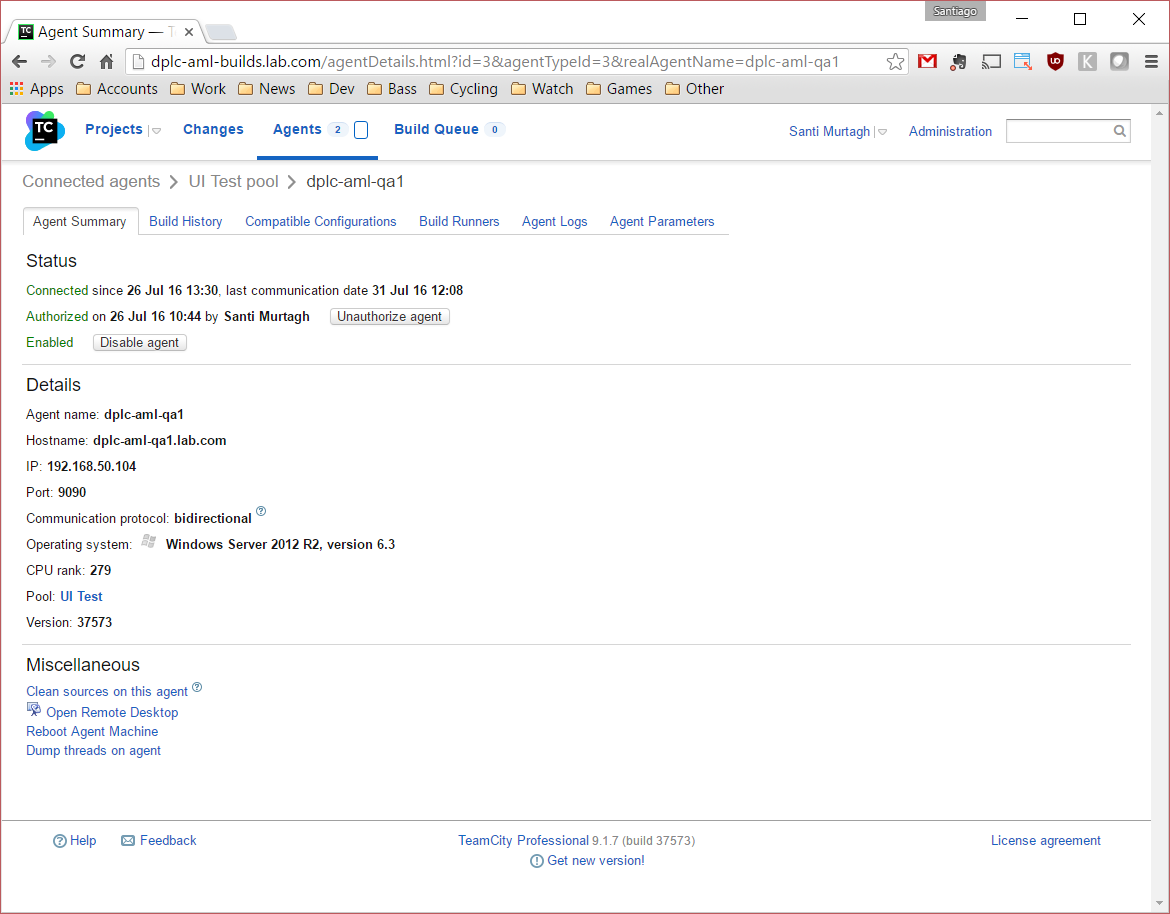
- Now on your build server console you should be able to Enable and Authorize your new build Agent. Note I had to install Build Tools 2015 for my Agent to be compatible with my build to run VSTest. You will have to find the right version of Build Tools for your version of Visual Studio.

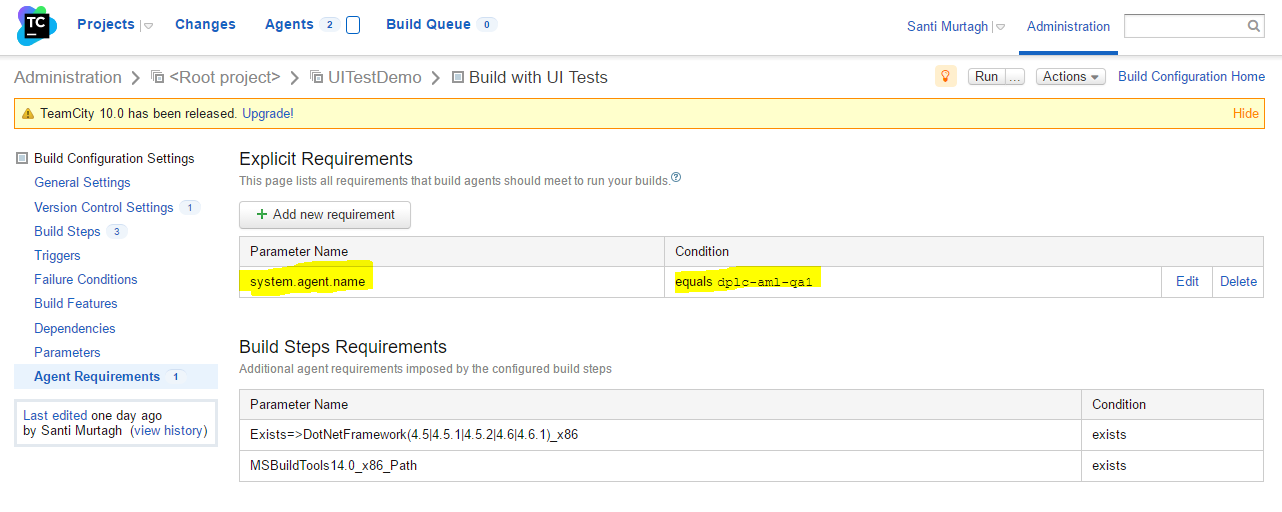
- On your project, create a new Build Configuration and set up your test runner as usual. If you have other build agents for local tests, I recommend setting up an Agent Requirement to make sure it only runs on my Agent created specifically for UI tests.

- Finally, just run your build. You can peek at your VNC viewer while it’s executing and you will see the application run and the tests on the VNC session.